Routine Service & Diagnostics
8–4
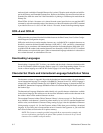
Shift
Recycle
– a “sliding” alphanumeric pattern
useful in identifying missing or malformed charac
-
ters, improper vertical alignment, or vertical compression.
All
E’
s
– a pattern of all uppercase letter E’
s useful in identifying missing characters, misplaced dots,
smeared characters, improper phasing problems, or light/dark character variations.
E’s
plus T
OF
– a pattern of all E’
s followed by a form feed to the next page top–of–form, useful in
identifying high speed paper motion feeding problems.
All
H’
s
– a pattern of all uppercase letter H’
s useful in detecting missing
characters, misplaced dots,
smeared characters, or improper phasing.
Underline Only – an underline pattern useful in identifying vertical hammer tip misalignment.
Black
Plot
– all odd dot positions are printed. This is useful in identifying horizontal hammer tip mis
-
alignment.
Shuttle
/ Ribbon
– a test that verifies proper operation by exercising shuttle and ribbon motion. This is
useful for spooling action without print and ribbon guide alignment.
Running the Self–Tests
The
P3000 printers include various self–test functions. Use the self–test as needed to determine if
the
printer is functioning normally.
T
o run the self–tests:
1. Place the printer off line and raise the printer cover.
2. Press
MENU DOWN; repeatedly press NEXT or PREV V
ALUE until DIAGNOSTICS is dis
-
played.
3. Press MENU DOWN, then repeatedly press NEXT or PREV VALUE until either PRINTER
TEST FULL WIDTH or PRINTER TEST 8 INCH WIDTH is displayed.
4. To
select one of the 8 INCH WIDTH
or FULL WIDTH paper tests, press MENU DOWN then
repeatedly
press NEXT or PREV V
ALUE until the appropriate test displays. T
ests include Shift
Recycle, All E’s, E Plus TOF, All H’s, and others (described in the Configuration chapter).
5.
Press R/S to begin the selected self–test; press R/S again to stop the test.
Examine
the print quality
. The characters should
be horizontally and vertically aligned and correctly
formed. If print quality problems exist, contact your authorized service representative.
6. Press CLEAR to place the printer off line. The display reads OFFLINE READY.
7. Close the printer cover and place the printer on line.
NOTE: Any data r
emaining in the buffer prints befor
e the self–test begins.


