


The following entry example shows that Remote Ink client previously connected to Remote Ink
service and cached the Remote Ink service information. Remote Ink service then used the cached
information to connect this time:
E XA MP LE
Discovered service net.tcp://ink.example.local:35706/RemoteInk in
Cache
Configuring user-specified and cached service information
If you are unable to use autodiscovery using DNS SRV records (for example, the DNS server cannot
be configured as described in Configuring autodiscovery of Remote Ink service on page 44), then the
Remote Ink client software will prompt you for the host name and port number of the computer
hosting Remote Ink service. You won’t be prompted to enter the host name and port number again
unless this information changes (for example Remote Ink service is moved to a different computer).
I MP OR TA N T
The port number must consist of numeric characters only. Do not type in separator characters,
such as spaces, commas or periods.
Use the following procedures to add the IP/Domain name and port number of the computer hosting
Remote Ink service to Remote Ink client software’s RemoteInk.exe.config file. Adding these details
to the config file enables Remote Ink client software to connect to Remote Ink service without trying
to find the SRV record pointing to the Remote Ink service on the network.
Use the following procedure to configure the RemoteInk.exe.config file in a SMARTMeetingPro
software installation or a Remote Ink client installation.
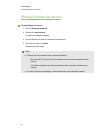
g To configure the RemoteInk.exe.config file in a installation
1. Go to the folder location appropriate to your operating system:
Operating
system
Location:
32-bit C:\Program Files\SMART Technologies\SMART Meeting
Pro\Remote Ink
64-bit C:\Program Files (x86)\SMART Technologies\SMART Meeting
Pro\Remote Ink
2. Copy the RemoteInk.exe.config file.
C H AP T ER 5
ConfiguringRemote Inksoftware
48