50
Starting a Conference by Calling a Remote Party
Chapter 3 Basic Videoconference
j History button
Clicking this button brings up the incoming/outgoing call
history display.
k Edit button
Clicking this button brings up the List Edit menu for the
selected party.
l Dial button
Clicking this button dials the selected party.
m Delete button
Clicking this button removes the selected party from the
One Touch Dial list.
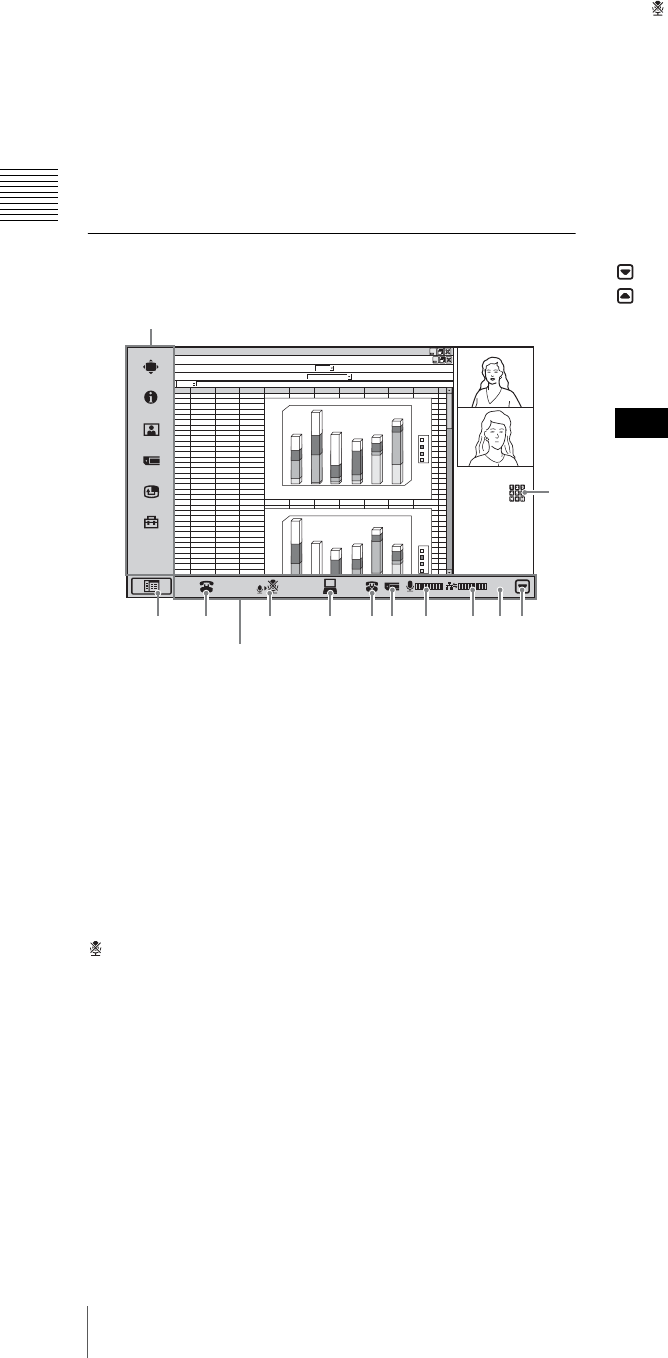
Using the Communication Screen
a Setup menu bar display button
By clicking this button, you can switch between hiding and
displaying the setup menu bar.
b Disconnect button
Click this button to end a communication.
c Mic On/Off button
Clicking this button turns the mic on or off.
The change is reflected in the mic level indicator and the
(Mic Off) button indicator on the main unit as well.
d DSM transmission button
This button is only displayed when a PCSA-DSM1 Data
Solution Module is installed.
Click this button to send or cancel data transmissions.
e Do not disturb indicator
Appears when “Do not disturb” in the Answer Setup menu
is set to “On”.
f Memory stick indicator
Appears when there is a “Memory Stick” inserted in the
memory stick slot.
g Mic level indicator
Shows the microphone input level. When the mic is turned
off, appears instead.
h Packet loss indicator
Shows the LAN line status.
i Elapsed time display
Displays the time elapsed from the start of communication.
j Communication control bar display hide button
By clicking this button, you can switch between hiding and
displaying the communication control bar.
: To hide the menu bar.
: To display the menu bar.
k DTMF button
Click this button to display the DTMF soft keyboard.
The DTMF button appears when “Display DTMF button”
is set to “On” on Page 10/11 of the Administrator Setup
menu.
To display detailed system information
Click the setup menu bar display button to bring up the
menu selection screen. Then click “Status & Info” from the
setup menu. The Status & Info menu which shows various
information about the local system and communication
settings appears.
1
2
3
4
5
6
7
8
9
10
11
12
13
14
15
16
17
18
19
20
21
22
23
24
25
26
27
28
29
30
31
32
33
34
12
4
5
6
69
44
46
67
12
16
7
76
23
45
26
57
23
15
34
56
76
38
13
12
ABCDEFGHIJKLMN
d
c
b
a
1
0
2
0
4
0
5
0
6
0
1
0
0
1
2
0
1
4
0
1
6
0
180
2
3
4
5
6
d
c
b
a
4
0
5
0
6
0
1
0
0
1
2
0
1
4
0
1
6
0
180
abcd
4
5
6
12
46
69
67
12
16
45
78
7
45
26
57
23
15
23
56
76
23
34
12
13
abcd
01:25
1 2 3 4 56 7 8 90
qa
Setup menu bar
Communication control bar
Note


