


64
Using Still Images Stored in a “Memory Stick” for a Videoconference
Chapter 4 Videoconference With Optional Equipment
3
Select the still image you want to display, then click
“Load”.
The menu disappears and the selected still image is
displayed.
To display a different image
While a still image is displayed, you can click b to return
to the previous image or B to go to the next image.
To delete a still image
On the Image viewer menu, select the image you want to
delete, and click “Delete”. Click “OK” when the message
“Delete File?” appears. The selected still image is deleted
from the “Memory Stick”.
To remove the “Memory Stick”
Carefully push the “Memory Stick” in. This causes it to
pop out slightly, and you can then remove it.
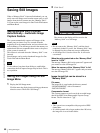
Sending a Still Image Stored on a
“Memory Stick”
During a communication session, you can send still images
stored on a “Memory Stick” to the remote party.
1
Insert a “Memory Stick” into the Memory Stick slot on
the Video Communication System, and display the
Image viewer menu.
For information on how to insert a “Memory Stick”
and how to display the Image viewer menu, see
“Displaying a Still Image Stored on a “Memory
Stick”” on page 63.
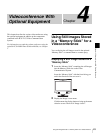
2
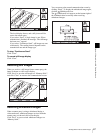
Select the still image you want to send, and click
“Send”.
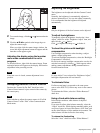
The selected still image is displayed, and is sent to the
remote party. The message “The still image has been
sent.” appears on the display.
To cancel still image display
Click “Clear”.
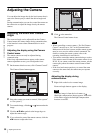
Right-click the mouse to display a help message.
Load Send Delete
Close
Image viewer
1/3
Format
IP:012.345.678.912
Back
Clear
01:25
The still image has been sent.