13 Scanning Services
134 Xerox WorkCentre 7232/7242 System Administration Guide
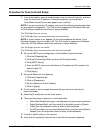
3) Click the [Create] button for a mailbox.
4) Enter the appropriate information.
5) Click on [Apply].
NOTE: If a passcode is set for the mailbox, entering the passcode will be required
each time a user accesses the mailbox.
3. From the touch screen, select [Scan to Mailbox].
1) Select the mailbox number to which you want to scan the document.
2) Load the sample document into the document feeder.
3) Press the <Start> button on the machine.
4. Verify that the scanned document is in the mailbox:
1) Select the mailbox number to which the document was scanned.
2) Select [Document List].
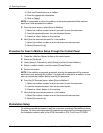
Procedure for Scan to Mailbox Setup through the Control Panel
1. Press the <Machine Status> button on the control panel.
2. Select the [Tools] tab.
3. Under [Setup & Calibration], select [Setup] and then [Create Mailbox].
4. Select a mailbox number, and then select [Create/Delete].
5. Set the information.
NOTE: If the mailbox is passcode-protected, entering the passcode will be required
each time a user accesses the mailbox. If a passcode is entered for a mailbox, no one
else can access that mailbox before entering the passcode.
6. From the [All Services] menu, select [Scan to Mailbox].
1) Select the mailbox number to which you want to scan the document.
2) Load the sample document into the document feeder.
3) Press the <Start> button on the machine.
7. Verify that the scanned document is in the mailbox:
1) Select the mailbox number to which the document was scanned.
2) Select [Document List].
Workstation Setup
To retrieve scanned documents, install the scan driver or activate CentreWare Internet
Services. For more information about the operating environment for the scan driver and
the installation method, refer to the HTML document in PCL Print Driver CD-ROM.


