Internet Fax Installation
Xerox WorkCentre 7232/7242 System Administration Guide 149
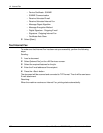
Test Internet Fax
An Internet Fax job should be submitted to make sure that the machine has been
installed and configured correctly.
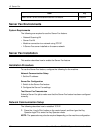
Network Communication Setup
NOTE: Some of the configuration options for this protocol are only available from
CentreWare Internet Services.
NOTE: Keep the SNMP port enabled while you use the machine on the TCP/IP
network.
Initially, activate the port.
1. Connect the machine to the network.
2. Press the <Log In/Out> button on the control panel, and then type the Key
Operator login ID to enter the Key Operator mode.
NOTE: The passcode may also be required depending on the machine configuration.
3. Press the <Machine Status> button on the control panel, and then select the
[Tools] tab on the screen.
4. Select [System Settings].
5. Select [Connectivity & Network Setup].
6. Select [Port Settings].
7. Select [Receive E-mail] and then [Change Settings].
8. Select [Port Status] and then [Change Settings].
9. Select [Enabled] and then [Save].
10. On the [Port Settings] screen, select [Send E-mail] and then [Change Settings].
11. Select [Port Status] and then [Change Settings].
12. Select [Enabled] and then [Save].
Next, establish TCP/IP.
When [IPv4 Mode] or [Dual Stack] is desired
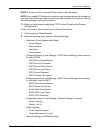
1. In [Connectivity & Network Setup], select [Protocol Settings].
2. Under [TCP/IP - Operation Mode], select [IPv4 Mode], or [Dual Stack].
3. Select [IP Address Resolution], and then [Change Settings].
4. Select a method for establishing an IP address from [DHCP], [BOOTP], [RARP],
[DHCP/Autonet], and [STATIC], and then select [Save].
NOTE: Use the DHCP server together with the Windows Internet Name Server
(WINS) server.


