


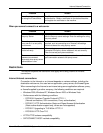


Add or Remove All Services Screen Buttons
Xerox WorkCentre 7232/7242 System Administration Guide 213
6. Locate the .dat clone file.
7. Click [Import Now].
NOTE: It may be necessary for you to use your web browser to view the Xerox
Standard Accounting set up of Users and Groups on the new machine.
Add or Remove All Services Screen Buttons
To Add or Remove All Services Screen Buttons:
1. Press the [Log In / Out] button to enter System Administration mode.
2. Type the correct user ID using the numeric keypad on the control panel or the
screen keyboard.
NOTE: The default System Administration ID is “11111”. If the Authentication feature is
enabled, you may also be required to enter a passcode. The default passcode is “x-
admin”.
3. Touch [Enter]
4. Press the [Machine Status] button on the Control Panel.
5. Touch the [Tools] tab.
6. Touch [System Settings].
7. In the Group column, touch [Common Service Settings].
8. Touch [Screen / Button Settings].
9. On the Screen / Button Settings screen, in the Items column, touch [All Services].
10. Touch [Change Settings].
11. To add a service screen button:
1) Touch a (Not Assigned) service button.
2) Touch the service to be added as a screen button.
3) Touch [Save].
The screen refreshes and returns to the All Services screen.
4) Touch [Save] again.
The screen refreshes and returns to the Screen / Button Settings screen.
12. To remove a service screen button:
1) Touch the service that you want to remove (for instance, Internet Fax).
2) Touch [Not Assigned].
3) Touch [Save].
The screen refreshes and returns to the All Services screen.
4) Touch [Save] again.
The screen refreshes and returns to the Screen / Button Settings screen.
13. Touch [Close].