EtherTalk Installation
Xerox WorkCentre 7232/7242 System Administration Guide 105
Initially, boot the EtherTalk port.
1. Connect the machine to the network.
2. Press the <Log In/Out> button on the control panel, and then type the Key
Operator login ID to enter the Key Operator mode.
NOTE: The passcode may also be required depending on the machine configuration.
3. Press the <Machine Status> button on the control panel, and then select the
[Tools] tab on the screen.
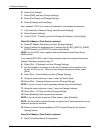
4. Select [System Settings].
5. Select [Connectivity & Network Setup].
6. Select [Port Settings].
7. Select [EtherTalk], and then [Change Settings].
8. Select [Port Status] and then [Change Settings].
9. Select [Enabled], and then [Save].
Workstation Setup
Install the print driver (Adobe PS) for Macintosh. Install the screen font if necessary.
Refer to the PostScript User Guide.
Test Print
To make sure that the machine has been installed on the network correctly a test print
should be submitted from each client workstation. Perform the following steps.
1. Open a sample document on a client workstation.
2. Select the machine using the Chooser (Mac OS 9.2) or the Print Center (Mac OS
X 10.x).
3. Print the document on the machine and verify that it prints correctly.
4. Make sure that the driver is installed on every workstation that will be sending jobs
to the machine.
5. Repeat the test for all workstations that will be sending jobs to the machine.
The installation process is now complete.
If the test print fails, refer to the Problem Solving chapter for assistance.


