


12 E-mail
132 Xerox WorkCentre 7232/7242 System Administration Guide
4. Select [System Settings].
5. Select [Connectivity & Network Setup].
6. Select [Port Settings].
7. For each of the following items,
• Scan to E-mail: [Send E-mail]
• E-mail Print: [Receive E-mail]
• Mail Notification Service: [Mail Notice Service]
8. Select the item, select [Change Settings], select [Change Settings] again, make
any changes as needed, and then select [Save].
9. Set or verify the IP address following the steps in the Network Communication
Setup section, below.
10. Set the other items required for the E-mail feature following the steps in the Email
Setting Setup section.
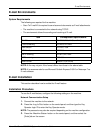
Test Mail
The E-mail job should be submitted to make sure that the machine has been installed
and configured correctly.
Network Communication Setup
NOTE: Some of the configuration options for this protocol are only available from
CentreWare Internet Services.
NOTE: Keep the SNMP port enabled while you use the machine on the TCP/IP
network.
Initially, activate the ports for E-mail.
1. Connect the machine to the network.
2. Press the <Log In/Out> button on the control panel, and then type the Key
Operator login ID to enter the Key Operator mode.
NOTE: The passcode may also be required depending on the machine configuration.
3. Press the <Machine Status> button on the control panel, and then select the
[Tools] tab on the screen.
4. Select [System Settings].
5. Select [Connectivity & Network Setup].
6. Select [Port Settings].
7. Select the required port and then [Change Settings].
• Scan to E-mail: [Send E-mail]
• E-mail Print: [Receive E-mail]
• Mail Notice Service/Notify Job End by E-mail: [Mail Notice Service]