


32-bit SuperDriver Setup
Printer Driver Configuration 2-19
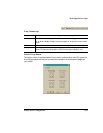
Adding a New Watermark
1 Choose the Add button.
When the Add button is selected the Watermark Edit fields will be filled by default
values. You may choose to accept or change any of the default option values.
2 Modify the settings for each Watermark Edit option as needed.
»Note:
See “Configuring Watermark Edit Options” on page 2-19 for a description of
Watermark Edit options.
3 Choose OK to save your changes and close the Watermark window or
choose Cancel to disregard your changes.
Deleting a Watermark
1 Select the watermark that you want to remove from the Watermark list.
2 Choose Delete.
The selected watermark disappears from the Watermark list.
3 Repeat steps 1 and 2 for each watermark that you want to remove.
4 Choose OK to save your changes and close the Watermark window or
choose Cancel to disregard your changes.
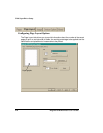
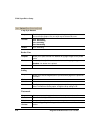
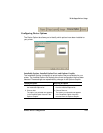
Configuring Watermark Edit Options
The following configuration settings are available for watermark options located on the
right-half of the Watermark window:
Watermark Name:
The name that identifies the watermark in the Watermark
list.
String:
The watermark text that appears on the printed media.
Color:
Either type or use the scroll buttons on this control to adjust the hue of
the watermark string. There is an adjustment control for red, blue and green.
Style:
Gives you optional choices of bold and italic text for your watermark.
Font:
Allows you to specify the font and font size for your watermark. You
may choose from any of the fonts installed on your computer. Changes to the
font and/or font size are reflected in the watermark graphic.