


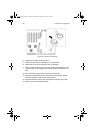


3 Hardware configuration
98
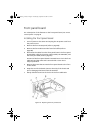
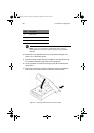
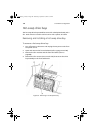
To remove a a 5.25-inch peripheral drive
1 Turn off power to the server and unplug the AC power cords from
the power source.
2 Remove the front access panel (refer to page 46).
3 Remove the fan modules and the foam fan baffle (refer to
page 88).
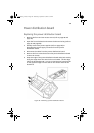
4 Disconnect the power and data cables from the back of the drive.
5 Facing the front of the drive, press in on the two black plastic tabs
(one on each side of the drive) to release the drive from the drive
bay.
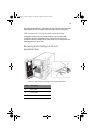
6 Carefully slide the drive out of the bay and place it on an antistatic
surface.
7 Remove the four screws that secure the two slide rails to the drive.
Save the screws and slide rails.
8 If you are installing a replacement device, skip to step 6 of the next
section to install that device.
9 Install the foam fan baffle, the fan modules, and the front access
panel.
Note: If you are not installing a replacement device, install a
metal EMI shield on the bay to maintain proper cooling and EMI
shielding.
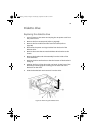
To install a 5.25-inch peripheral drive
Caution! To avoid damage to a 5.25-inch peripheral drive, ensure
that the EMI gasket provided in the front of the lower bay does
not bridge or short any open circuits on the peripheral drive. If
the drive has open circuits, install it in one of the two upper
peripheral drive bays.
1 Turn off power to the server and unplug the AC power cords from
the power source.
2 Remove the front access panel (refer to page 46).
3 Remove the fan modules and the foam fan baffle (refer to
page 88).
AA G900 ug - EN.book Page 98 Wednesday, September 25, 2002 5:23 PM