16. Servicing
G
Image 16-11
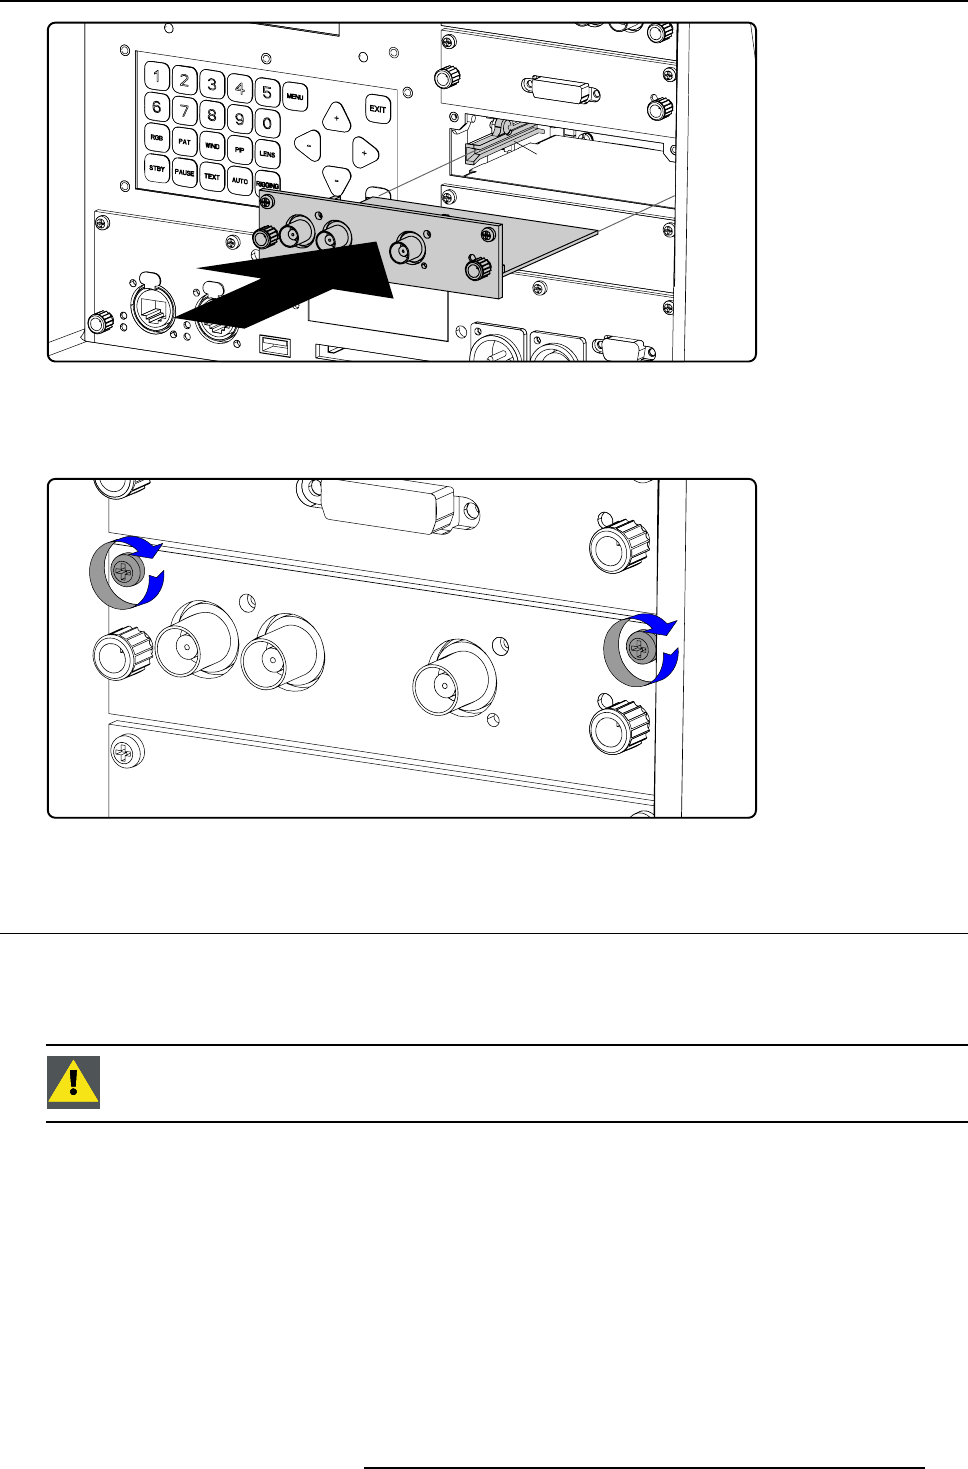
3. Push the input module forward until you feel that the connector of the input module fitinth
e socket of the input slot. The back of
the front plate of the module must touch the front plate of the input & communication unit.
4. Secure the input module by fastening both captive screws in the top corners of the module.
Image 16-12
16.7 Realignment of the lamp in its reflector
Why realigning the lamp ?
With longer run times, the light output of the lamp will decrease, which results in a lower light output on the screen. This light output
decrease can be compensated by readjusting the Z-position of the lamp.
WARNING: This procedure may only be performed by qualified technical service personnel.
How to realign the lamp in its reflector ?
1. Remove the cover of the lamp, see "Removal of the lamp cover", page 195.
2. Connect the projector to the local power net, see "Power connection", page 35.
3. Start up the projector, enter the menu structure and select Lamp / Z-axis (for more explanation, see "Z-axis adjustment", page
115)
4. Carefully turn the thumb screw (A) at the rear of the lamp house clockwise for maximum light output. Once over the maximum,
turn slightly counterclockwise to reach the maximum light output again.
R5976921 FLM R20+ PERFORMER 15/03/2010
191


