8. Input menu
CAUTION: Always install a cover plate on an unused input slot. This to prevent dust intrusion into the pro-
jector.
8.2.2 Input configuration
How to change?
1. Press MENU to activate the menus.
2. Use the ▲ or ▼ key to select Input and press ENTER.
The Input menu is displayed.
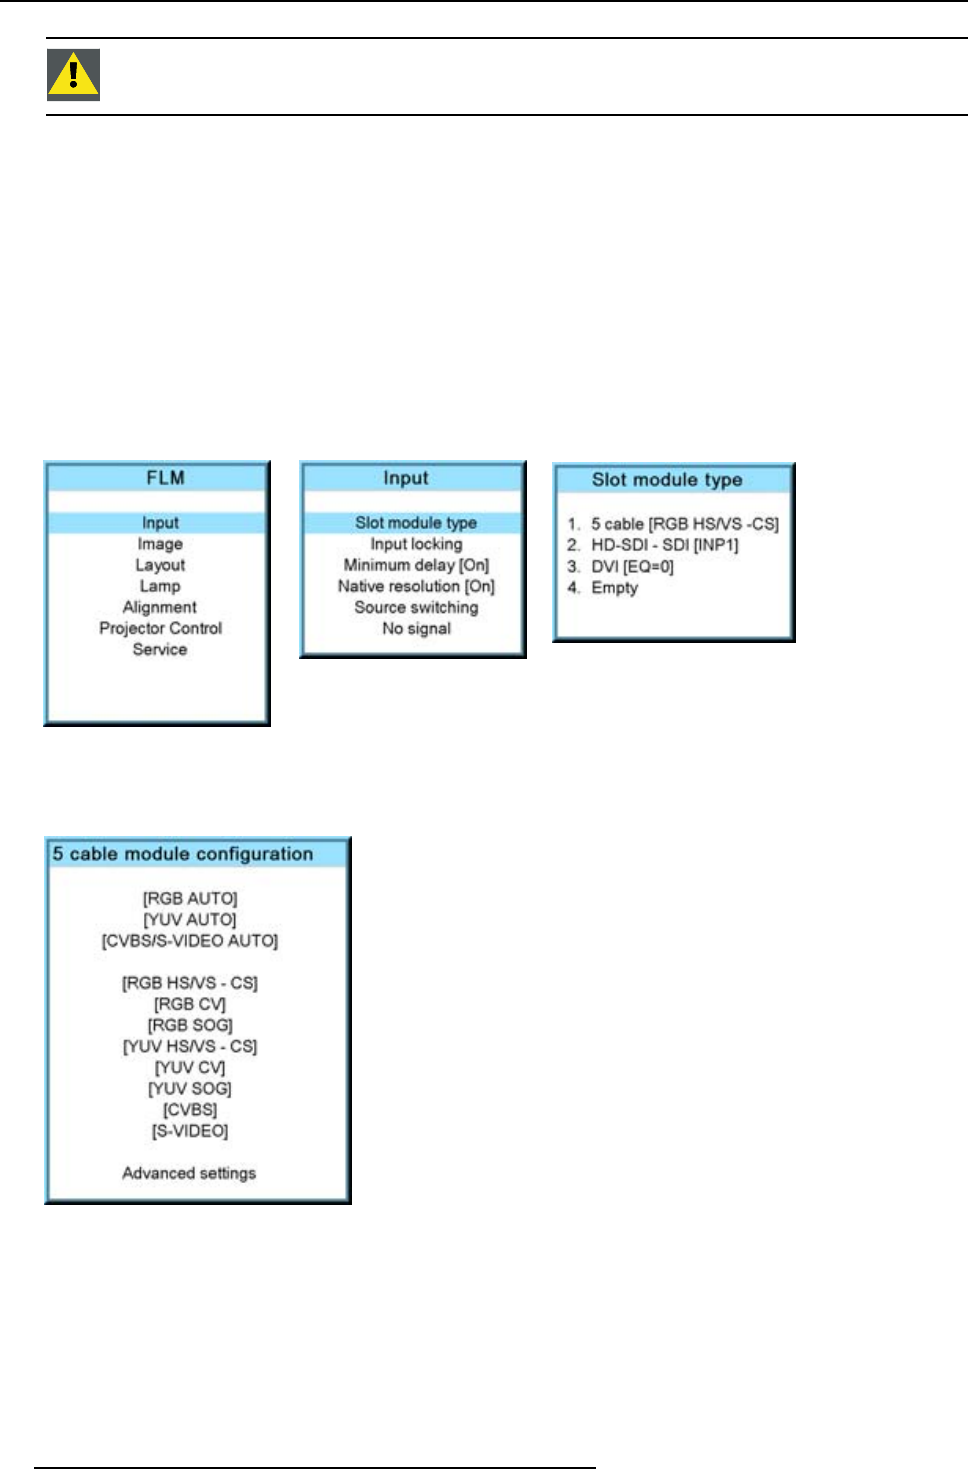
3. Use the ▲ or ▼ key to select Slot module type and press ENTER.
The slot overview window is displayed with the actual situation filled out.
4. Use the ▲ or ▼ key to select a slot.
Press ENTER to open the selection menu which will be different from input type to input type (except for DVI, see DVI equaliza-
tion).
Image 8-1
Image 8-2
Image 8-3
For a 5 cable module
When ENTER is pressed on a 5 cable module, the following menu appears:
Image 8-4
Use the ▲ or ▼ key to select the desired configuration and press ENTER to select.
When e.g. RGB AUTO is selected, the projector discovers itself which type of RGB signal is connected to it and loads the correct
settings.
For RGB selections, advanced settings are possible. To adjust these advanced settings, use the ▲ or ▼ key to select Advanced
settings and press ENTER. The advanced settings menu opens:
60
R5976921 FLM R20+ PERFORMER 15/03/2010


