9. Image menu
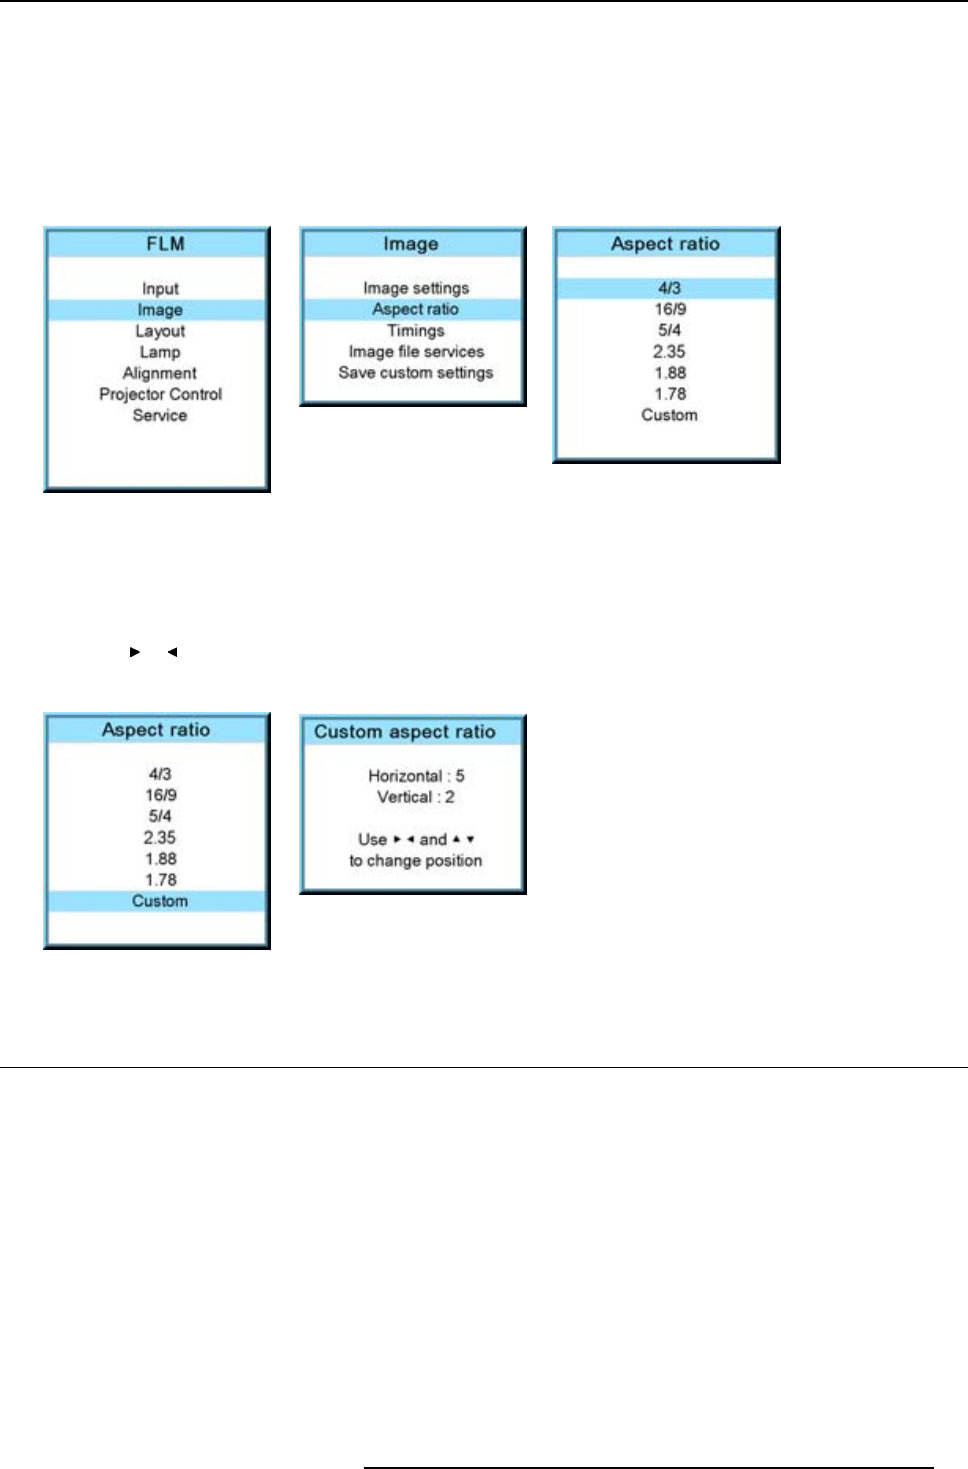
How to select an Aspect ratio?
1. Press MENU to activate the menus.
2. Use the ▲ or ▼ key to select Image and press ENTER.
3. Use the ▲ or ▼ key to select Aspect ratio and press ENTER.
The aspect ratio menu will be displayed.
4. Use the ▲ or ▼ key to select the desired aspect ratio and press ENTER.
Image 9-57
Image 9-58
Image 9-59
How to set up a custom aspect ratio?
1. Select fi rst Custom and press ENTER to activate.
The Custom aspect ratio dialog box opens.
2. Use the ▲ or ▼ key to adjust the vertical size of the image.
Use the or key to adjust the horizontal size of the image.
When the desired aspect ratio is obtained, press EXIT.
Image 9-60
Image 9-61
9.5 Timings
9.5.1 Source timings
Adjustable items
• Horizontal start in pixels : number of pixe
ls between the beginning of the input signal and the start of the video information in
the signal.
• Width = Active horizontal pixels : determine the width of the window on the screen. This value is normally given in the source
specifications. If not, adjust until full image is displayed (no missing pixels).
• Vertical start in lines : number of lines between the start of the input signal and start of the image on the screen.
• Height = Active vertical lines : number of horizontal lines determining the height of the projected image. this value is normally
given in the specification of the source. If not, adjust until full image height is displayed (no missing lines).
• Total pixels: Total horizontal pixels in the source. If the value is wrong, sampling mistakes (small vertical bars in the projected
image) will be seen in the image.
• Total lines: Total vertical lines in the source.
R5976921 FLM R20+ PERFORMER 15/03/2010
83
