


IV - 9
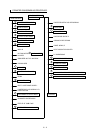
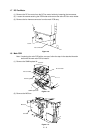
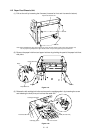
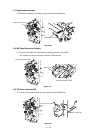
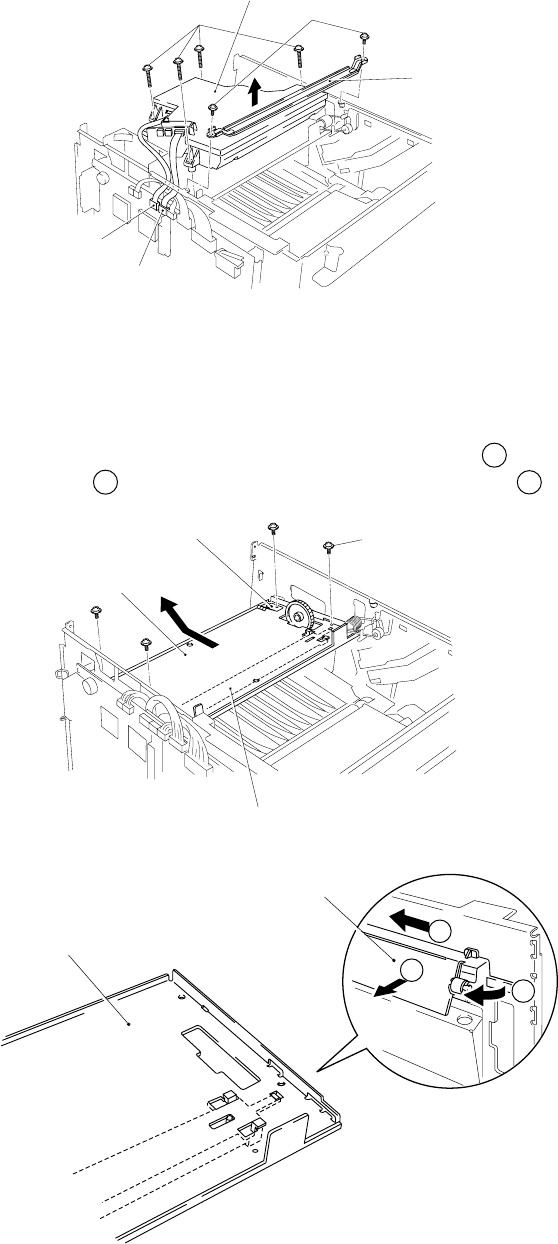
1.10 Scanner Unit
(1)
Unplug the LD PCB harness (scanner flat cable) connector (6P), and SCN harness connector
(4P).
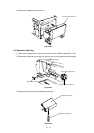
(2) Remove the beam from the body by loosening the screws.
(3) Remove the scanner unit from the body by loosening the screws.
Caution: Do not disassemble the scanner unit, it can be only adjusted at the factory.
Figure 4.20
Figure 4.19
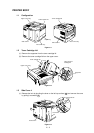
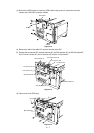
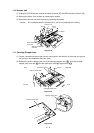
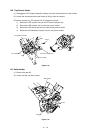
1.11 Cartridge Stopper Assy
(1)
Loosen 4 screws and remove the scanner mount plate in the direction of the arrow (the
ground
leaf spring is also released at the same time.)
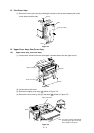
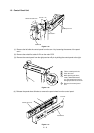
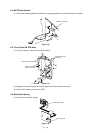
(2) Release the hook by bending the arm of the cartridge stopper assy ( A ), slide the cartridge
stopper assy to the left ( B ) and the remove the cartridge stopper assy ( C ).
Figure 4.18
SCN harness 4P
connector
Screws
Screws
Scanner unit
Ground leaf spring
Scanner mount plate
Screws
Cartridge stopper assy
Scanner mount plate
Cartridge stopper assy
C
B
A
Beam
Scanner flat cable 6P
connector
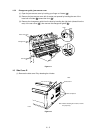
Right side
Left side
Rear
Front