IV - 24
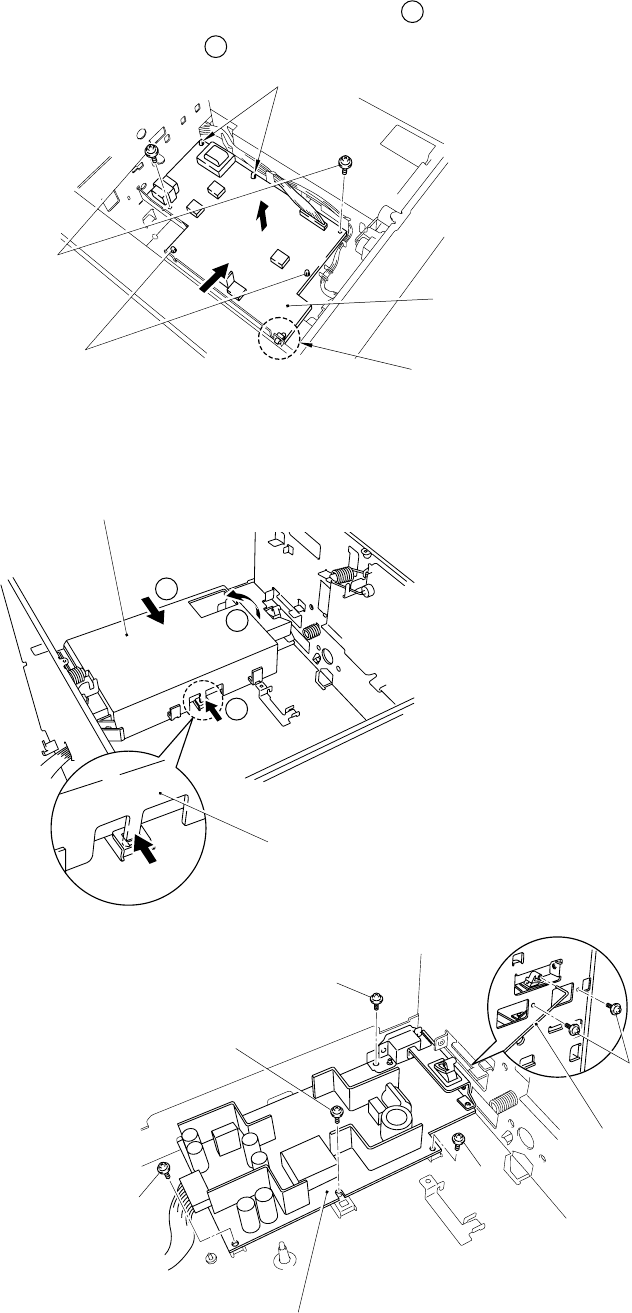
1.33 High-Voltage Power Supply PCB
(1) Loosen the 2 screws.
(2) Hold the head of 4 resin spacers and lift this side of PCB ( A ).
(3) Slide the PCB to the opposite side ( B ).
(2) Remove the PS switch wire.
(3) Loosen the 2 screws on the side.
(4) Loosen the 4 screws on the top.
Figure 4.63
Figure 4.62
1.34 Low-Voltage Power Supply PCB Assy
(1) Be sure to remove the heat insulation cover before removing the low-voltage power supply block.
Figure 4.64
Resin spacers
Screws
The PCB can be detached without
removing this spacer
Resin spacers
Heat insulation cover
Heat insulation cover
Screw
Low-voltage power supply
PCB assy
PS switch wire
Screw
Screw
Screw
Screw
Hook
Hook
A
B
C
High-voltage power supply PCB assy


