


VI - 17
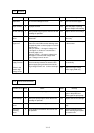
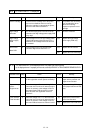
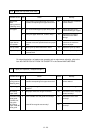
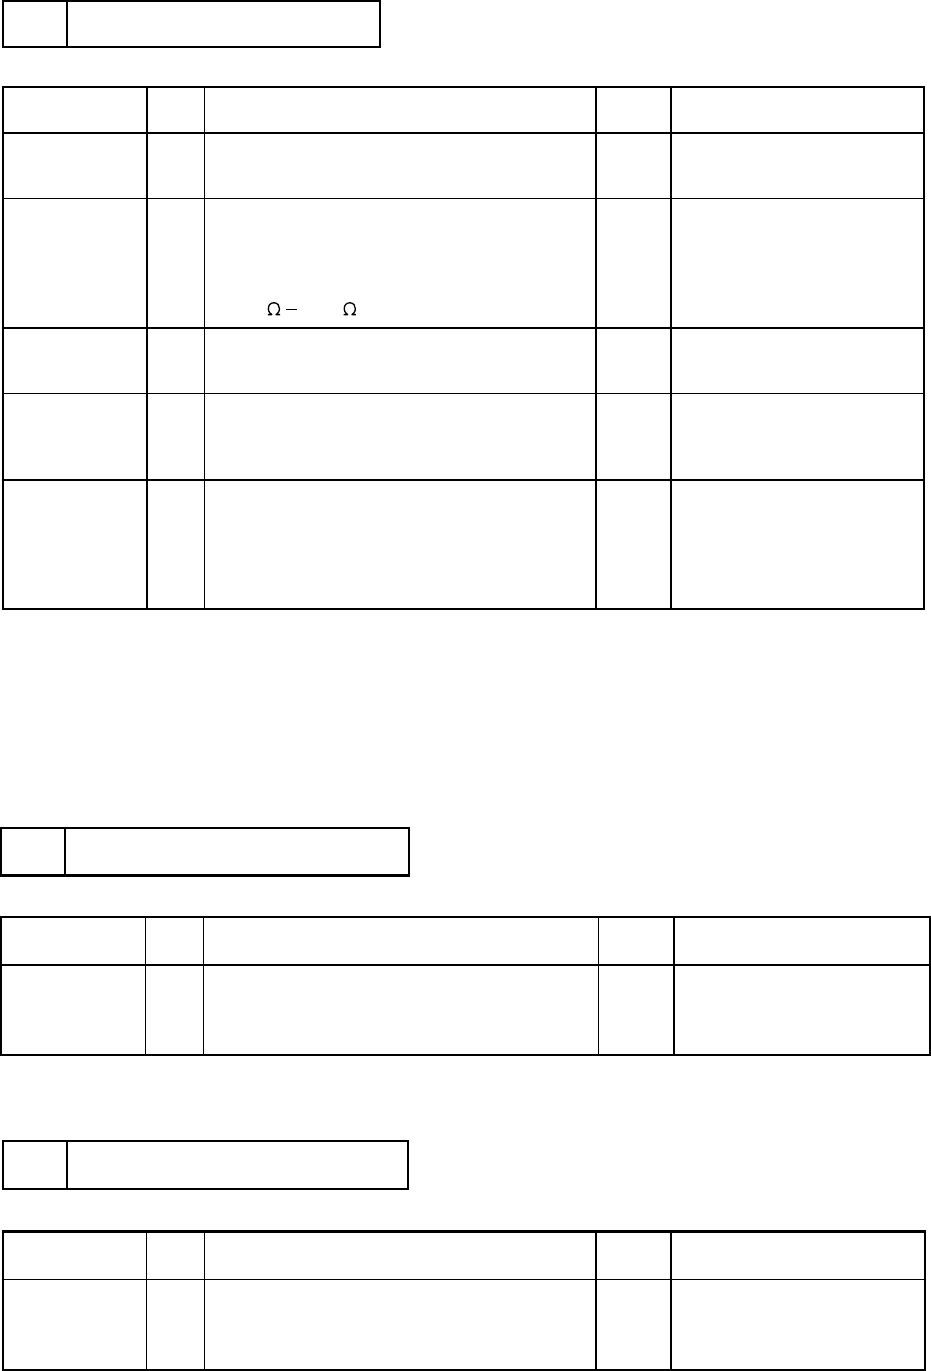
Possible cause Step Check Result Remedy
Thermal fuse 1 Is the thermal fuse located in the fixing unit
conductive?
No Replace the fixing unit.
Thermistor 2 Remove the fixing unit from the printer and
measure the resistance between two pins of
the 2 pin connector on the fixing PCB. Is the
measured resistance within the range of
1.0 M 1.6M (normal temperature)?
No Replace the fixing unit.
"50 FUSER MALF" is displayedM-14
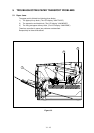
Fixing heat
roller
3 Is the fixing heat roller located in the fixing unit
conductive?
No Replace the fixing heat roller.
Low-voltage
power supply
PCB
4 When the power is switched on, does the
voltage at connector pin P4-1 on the main
PCB go from 5V to 0V?
Yes Replace the low-voltage
power supply PCB assy.
Main PCB 5 Make sure if:
The EP-ED cartridge is installed in the printer
correctly.
The upper cover of the printer is closed.
A paper-loaded cassette is mounted.
No Replace the main PCB assy.
Note: When the printer has detected a fixing unit malfunction, do not power on for about 15
minutes.
Even if the power is on, the printer will shut off the power supply to the fixing heat roller
to prevent the fixing the unit from overheating.
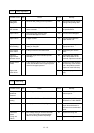
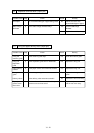
Replace the main PCB assy ,
the SCN harness 4P,SCN flat
cable 6P or the scanner unit.
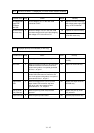
Possible cause Step Check Result Remedy
Main PCB
Scanner harness
1 Is the problem remedied when the power off
and on again?
No
"51 LASER BD MALF" is displayedM-15
Replace the main PCB assy,
the SCN harness 4P, SCN flat
cable 6P or the scanner unit.
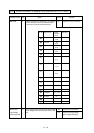
Possible cause Step Check Result Remedy
Main PCB
Scanner harness
1 Is the problem remedied when the power off
and on again?
No
"52 SCANNER MALF" is displayedM-16
Scanner unit