


Installing the 8H02-16
8H02-16 User’s Guide 3-5
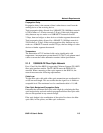
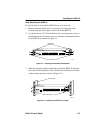
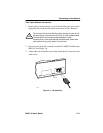
Rack Mounting the 8H02-16
Proceed as follows to install the 8H02-16 into a 19-inch rack.
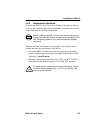
1. Remove and discard the four cover screws (two from each side)
located along the front edges of each side of the 8H02-16.
2. Locate the four 6-32 x 3/8-inch flat head cover replacement screws in
the rackmount kit. Use these screws to attach the rackmount brackets
to the 8H02-16 as shown in Figure 3-3.
Figure 3-3 Installing the Rackmount Brackets
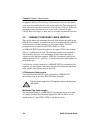
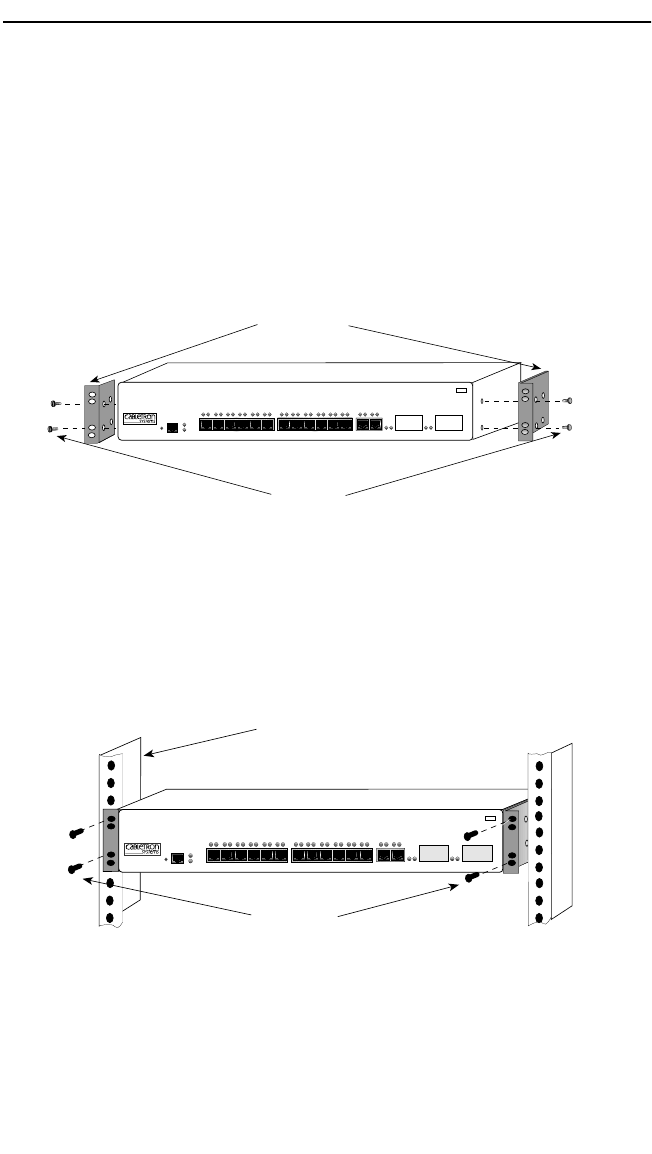
3. With the mounting brackets installed, position the 8H02-16 between
the vertical frame members of the 19-inch rack and fasten it securely
with mounting screws as shown in Figure 3-4.
Figure 3-4 Installing the 8H02-16 in a Rack
Screws (4)
Rackmount
Brackets (2)
1742-04
8H02-16
COM
SmartSwitch 10/100
WITH
S
ECURE
F
AST VIRTUAL NETWORKING
1X 2X 3X 4X 5X 6X 7X 8X 9X 10X 11X 12X 13X 14X 15 16
Smart
SWITCH
MMAC
PWR
CPU
RESET
Screws (4)
8H02-16
COM
SmartSwitch 10/100
WITH S
ECURE
F
AST VIRTUAL NETWORKING
1X 2X 3X 4X 5X 6X 7X 8X 9X 10X 11X 12X 13X 14X 15 16
Smart
SWITCH
1742-03
MMAC
PWR
CPU
RESET
19-Inch Rack