


Sending Documents
4‑24
Scan Density and Original Type Settings
You can set the scan density and select the original type before scanning the original.
Manual Density Adjustment
You can manually adjust the scan density to the most appropriate level for the original.
If you select the Color mode, you should manually adjust the scan density.
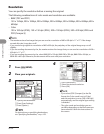
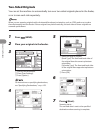
1 Press (SEND).
2 Place your originals.
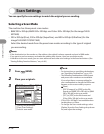
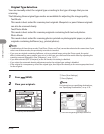
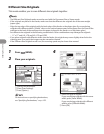
3
① Specify the destination.
②
Press [Scan Settings].
③
Press [Option].
For instructions on specifying destinations,
see “Specifying Destinations,” on p. 4‑32.
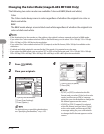
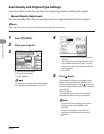
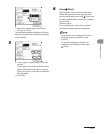
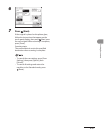
4
① Press [Light] or [Dark] to adjust the scan
density.
Press [Light] to move the indicator to the
left to make the density lighter, or press
[Dark] to move it to the right to make the
density darker.
② Press [OK].
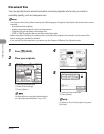
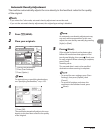
5 Press (Start).
If the original is placed on the platen glass,
follow the instructions that appear on the
touch panel display, then press (Start) once
for each original. When scanning is complete,
press [Done].
Scanning starts.
The scanned data is sent to the specified
destination when scanning is complete.
To cancel the scan settings, press [Scan
Settings], then press [Option], then
[Cancel].
To cancel all settings and return the
machine to the Standard mode, press
(Reset).
–
–