


6-20
Using the Fax Functions
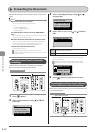
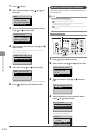
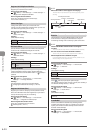
1 Press [ ] (Menu).
2 Select <System Settings> using [ ] or [ ] and
press [OK].
Menu
USB Direct Print Se
...
Printer Settings
Adjustment/Maintena...
System Settings
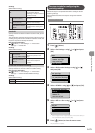
3 Select <Communication Management Settings>
using [ ] or [ ] and press [OK].
System Settings
Device Information
...
Dept. ID Management
...
Security Settings
Communication Manage
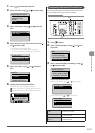
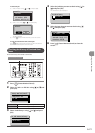
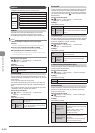
4 Select <Memory Lock Settings> using [ ] or [ ]
and press [OK].
When <Memory Lock PIN> is set, enter the number using the
numeric keys and press [OK].
Communication Mgt. Set
Fax Settings
Memory Lock Settings
5 Select <Off> using [ ] or [ ] and press [OK].
Memory Lock Settings
Off
On
Fax documents saved in the memory are combined and printed.
6 Press [ ] (Menu) to close the menu screen.
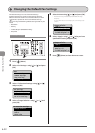
Checking and Deleting Received Faxes
Check the details of faxes stored in memory. Delete faxes that
you no longer need.
NOTE
About faxes stored in memory
You can specify forwarding destinations.
“Forwarding Fax Documents” (→P.6-16)
You can combine and print documents saved in the memory
instead of printing during receiving.
“Combining and Printing the Received Documents You Saved”
(→P.6-19)
OK
Status Monitor/Cancel
Keys to be used for this operation
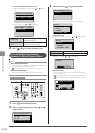
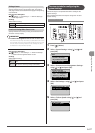
1 Press [ ] (Status Monitor/Cancel).
2 Select <RX Job> using [ ] or [ ] and press [OK].
Status Monitor/Cancel
Device Status
Copy/Print Job
TX Job
RX Job
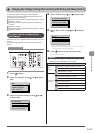
3 Select <Job Status> using [ ] or [ ] and press
[OK].
RX Job Status/History
Job Status
Job History
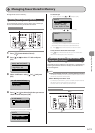
4 Select the job that you want to check or delete
using [ ] or [ ] and press [OK].
RX Job Status
12:52AM Receiving
12:54AM Waiting: Prin
The details of the job is displayed.
Details
<Delete>
<Forward>
Job Number: 0004
Status: Waiting to ...