


7-8
Using the Scan Functions
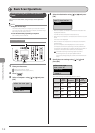
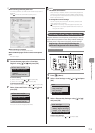
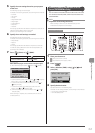
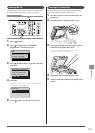
5 Specify the scan settings based on your purpose
of the scan.
The following settings can be changed.
For details on the setting procedure, see “Scanning” in the e-Manual.
• Scan Size
• File Format
• Density
• Original Orientation
• Original Type
• 2-Sided Original
• Sharpness
• Data Size
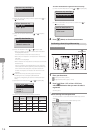
The settings specified here are effective only for the current task. To
make the settings effective for all send operations, see “Scanning” in
the e-Manual.
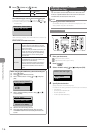
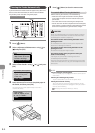
6 Press [ ] (Color) or [ ] (B&W).
For Color Scan
Press [
] (Color).
For Black and White Scan
Press [
] (B&W).
Scanning starts.
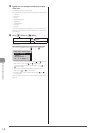
When additional pages can be scanned on the platen glass
(1) Place the next page and press [
] (Color) or [ ] (B & W).
Scan Next: Press Start
<Start Sending>
<Cancel>
Destinations: 1
No. of TX Pages: 1
* To cancel scanning, select <Cancel> using [ ] or [ ] and press
[OK] → select <Yes> using [ ] or [ ] and press [OK].
* To check the destination, select <Destinations> using [ ] or
[ ] and press [OK].
* To check the number of scanned pages, select <No. of TX
Pages> using [ ] or [ ] and press [OK].
(2) To finish scanning, select <Start Sending> using [ ] or [ ]
and press [OK].
When scanning is complete, the scanned document is sent to the
file server.