


6-23
Using the Fax Functions
Change the settings for sending and receiving faxes.
For details on the procedure for setting specifications or the
setting items, see the next items.
“The steps to take for configuring the send settings” (→P.6-23)
“Options” (→P.6-23)
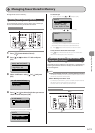
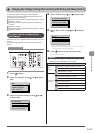
“The steps to take for configuring the receiving settings”
(→P.6-25)
“Options” (→P.6-26)
“The steps to take for configuring the system settings” (→P.6-27)
“Options” (→P.6-28)
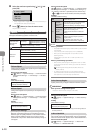
The steps to take for configuring the
send settings
Follow the steps in the procedure below to configure the send
settings.
The procedure describes the steps to change the “ECM TX”
setting.
Menu
OK
Keys to be used for this operation
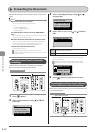
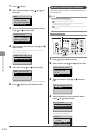
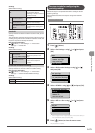
1 Press [ ] (Menu).
2 Select <Fax Settings> using [ ] or [ ] and press
[OK].
Menu
Timer Settings
Common Settings
Copy Settings
Fax Settings
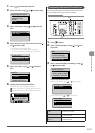
3 Select <TX Function Settings> using [ ] or [ ]
and press [OK].
Fax Settings
Basic Settings
TX Function Settings
RX Function Settings
RX Print Settings
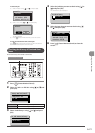
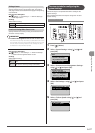
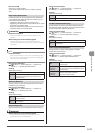
4 Select <ECM TX> using [ ] or [ ] and press [OK].
TX Function Settings
Change Defaults
Register Unit Name
...
ECM TX
Pause Time
5 Select <Off> or <On> using [ ] or [ ], and press
[OK].
ECM TX
Off
On
*
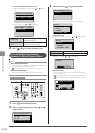
Select <Apply> when <Apply> appears on the screen after you
have specified the setting and press [OK].
6 Press [ ] (Menu) to close the menu screen.
The procedure is complete.
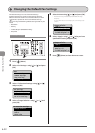
Options
Configure the following options to send a fax.
Fax Settings
Basic
Settings
“Register Unit Telephone Number” (→P.6-24)
“Select Line Type” (→P.6-24)
“Off-Hook Alarm” (→P.6-24)
TX Function
Settings
“Change Defaults” (→P.6-24)
“Register Unit Name (Fax)” (→P.6-24)
“ECM TX” (→P.6-24)
“Pause Time” (→P.6-24)
“Auto Redial” (→P.6-24)
“Sender ID” (→P.6-25)
“Check Dial Tone Before Sending” (→P.6-25)
Changing Fax Settings (Settings that Can Be Specified Using the [Menu] Button)