


7-4
Using the Scan Functions
Shortcut Key Settings
Register
Confirm Destination
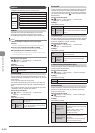
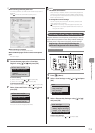
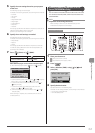
(2) Select the shortcut key that you want to register using [ ] or
[ ] and press [OK].
Select Shortcut Key
Scan PC1
Scan PC2
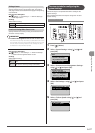
(3) Select the connection method using [ ] or [ ] and press
[OK].
Specify destination
Off
USB Connection
Network Connection
(4) Select the destination using [ ] or [ ] and press [OK].
• When a computer connected via a USB cable is included in
the displayed destinations:
The USB-connected computer is listed at the top.
• When only one computer is connected to the machine via a
USB cable:
This screen is not displayed.
• When more than 10 computers are connected to the machine
simultaneously:
Up to 10 computers can be displayed as a list of computers
connected to the machine. (Scanning cannot be performed
to the eleventh and subsequent computers. Reduce the
number of computers connected to the machine over the
network.)
e-Manual→Scanning→Scanning Paper Documents
and Saving Them to a Computer (USB & Network
Connection)→Registering the Scanner in MF Network Scan
Utility
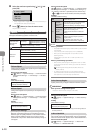
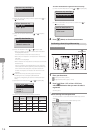
(5) Specify the scan settings using [ ] or [ ] and press [OK].
Select Scan Type
Color Scan
B&W Scan
Custom 1
Custom 2
The scanner settings are specified by default as follows.
Scan
Mode
Resolution File Type PDF Settings
Color Scan Color 300 dpi PDF
Searchable/
High
B & W Scan
Black and
white
300 dpi TIFF –
Custom 1 Color 300 dpi JPEG/Exif –
Custom 2 Color 300 dpi PDF
Searchable/
Standard
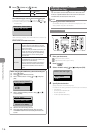
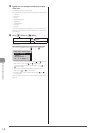
To confirm the destination registered in the shortcut key:
(1) Select <Confirm Destination> using [ ] or [ ] and press [OK].
Shortcut Key Settings
Register
Confirm Destination
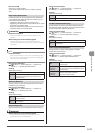
(2) Select the destination that you want to confirm using [ ] or
[ ] and press [OK].
Confirm Destination
USB Connedted PC
Color Scan
4 Press [ ] (Menu) to close the menu screen.
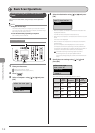
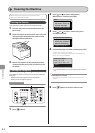
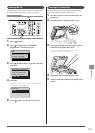
Performing a Scan Using a Shortcut Key
OK
Scan PC1
Scan PC2
Keys to be used for this operation
1 Place your document.
“Placing Documents” (→P.2-4)
“Supported Document Types” (→P. 2-2)
2 Press [ ] (Scan > PC1 or Scan > PC2) into
which the destination that you want to select is
registered.
Scanning starts.
When scanning cannot be performed
You cannot perform a scan while the MF Toolbox setup screen is
displayed.
Click [ ] to close the screen before starting a scan.