


9-6
Chapter 9 Job Registration Tool Settings
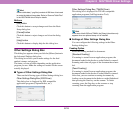
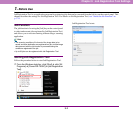
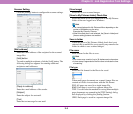
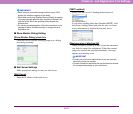
Scanner Setting
Click the [Setting] button to configure the scanner settings.
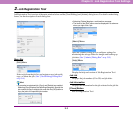
[Mail address]
Enter the e-mail address of the recipient for the scanned
image files.
[Add] button
To send to multiple recipients, click the [Add] button. The
following dialog box appears for entering additional
recipient e-mail addresses.
[Reply-to address]
Enter the e-mail address of the sender.
[Subject]
Enter the subject for sent mail.
[Text]
Enter the text message for sent mail.
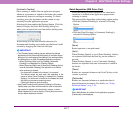
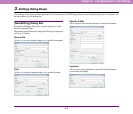
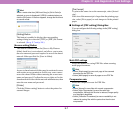
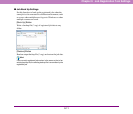
[Save Image]
Select this to save scanned images.
[Save to My Pictures folder] Check Box
Select this check box to save image files to the My Pictures
folder of the user logged in to Windows.
Hint
• The name displayed for My Pictures differs depending on the
version of Windows you are using.
Example: My Pictures, Pictures
• When this check box is not selected, the [Save in folder] and
[Access setting] buttons are enabled.
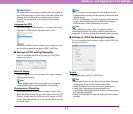
Save in folder
When the [Save to My Pictures folder] check box is not
selected, this is enabled for you to specify any name for the
folder in which to save scanned images.
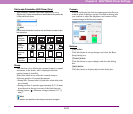
File name
Enter a name for the files to save.
Hint
• File names may consist of up to 32 alphanumeric characters.
• A time stamp is appended to the file name to indicate the time
of scanning.
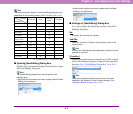
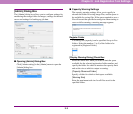
File type
Select the file format for the files to be saved.
When multi-page documents are scanned, image files are
created as follows in accordance with the file format.
PDF: All pages are saved in a single image file.
BMP: Each page is saved in a separate image file.
TIFF: You can select the method for saving when multiple
page documents are scanned in the [TIFF Setting] dialog
box displayed by clicking the [Setting] button.
JPEG: Each page is saved in a separate image file.