


74 Scanning Chapter 9
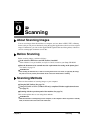
Scanning Using The MP Toolbox
MP Toolbox contains buttons for scanning documents to your computer and processing and saving
them. For details on using the MP Toolbox, see Software Guide, located on your Setup CD-ROM.
Follow this procedure:
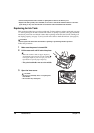
1 Load the document on the platen glass. (See page 14)
2 On the Windows desktop, double-click [Canon MP Toolbox 4.1].
• Or, click [Start] on the taskbar, point to [(All) Programs], [Canon], and [MP Toolbox 4.1], then click
[Toolbox 4.1].
• The MP Toolbox opens.
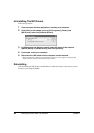
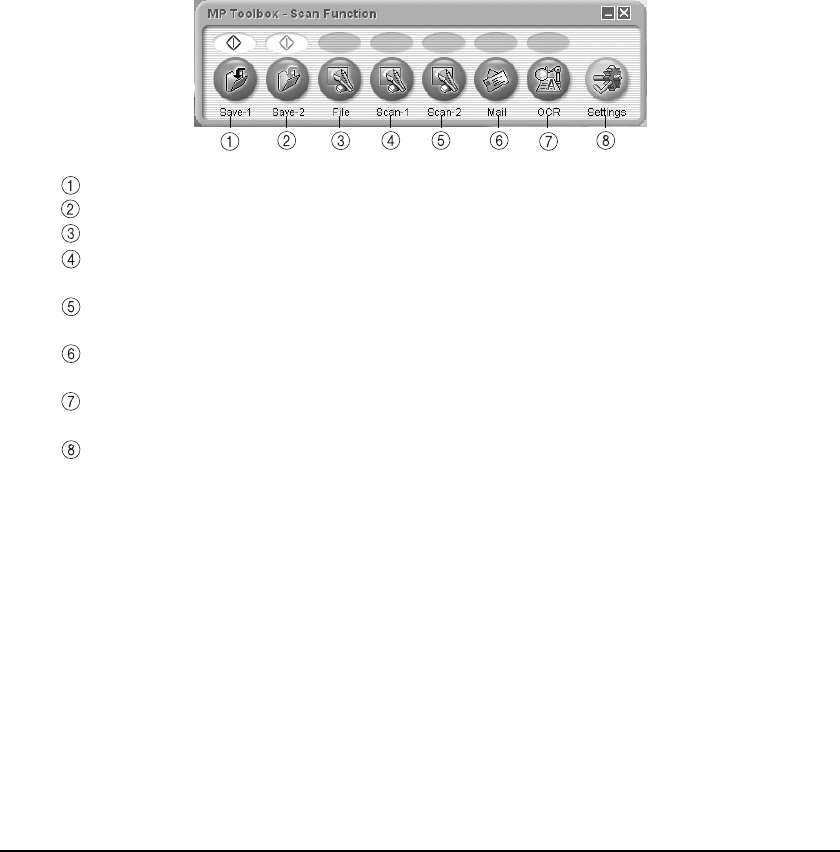
3 Click the MP Toolbox button to be used.
Save-1 The document is scanned in black & white, and saved.
Save-2 The document is scanned in color, and saved.
File The document is scanned, and stored as a PDF file.
Scan-1 The document is scanned, and displayed in a registered application
software.
Scan-2 The document is scanned, and displayed in a registered application
software.
Mail The document is scanned, and the image is attached to an e-mail using an
e-mail application software.
OCR The document is scanned, and converted to text data by an OCR (Optical
Character Recognition) application software.
Settings When a scanner other than this machine is connected to the computer, this
button will enable you to select which scanner to use. Also, you can
change the correspondence between the MP Toolbox buttons and the
[Black] and [Color] keys.
When the utility software on the Setup CD-ROM are installed, one part will be registered in the
MP Toolbox buttons.
[OCR] button ScanSoft OmniPage SE
[Scan-1] button ArcSoft PhotoStudio