


www.axxessid.com
Installation & User Guide
AX200 Installation & User Guide – July 2007
102
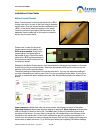
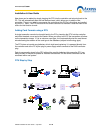
Mains Present Sensor
Mains Present sensor is directly connected to the i-BOX
through one of the 14 ports on the back using a standard
sensor cable. Once the sensor has been detected by the
i-BOX, a new device wizard will appear on the screen.
Follow the on-screen prompts to add the sensor to the
database. Use the cable ties on the sensor to strap the
sensor onto the mains cable.
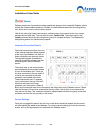
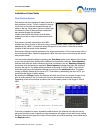
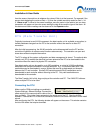
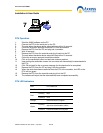
Please note: in order for the mains
present sensor to work reliably, the i-
BOX must be earthed. Every mains
present sensor is supplied with an
earth cable & plug. Connect the earth
cable to the i-BOX as demonstrated in
the picture and plug the other end into
the electrical socket.
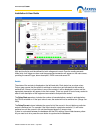
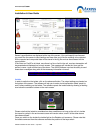
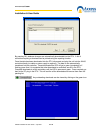
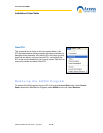
Settings for the Mains Present sensor could be accessed in the environment section. In the main
screen click on the environment button. Select the appropriate i-BOX from the menu on the left
and click on the mains present sensor.
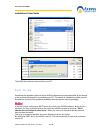
The default settings are displayed in the screen-shot below. You may use alternative settings if
you wish. Remember you have to press “Save” for the new settings to take effect. If at any time
you wish to restore the default settings press the Auto Setup button located at the bottom of the
screen.
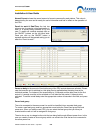
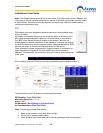
Read frequency indicates how often the sensor checks the presence of mains in the cable;
Reporting frequency shows how often the reading is reported & Store frequency indicates how
often the reading is stored in the log file. The Gain value (0<Gain<63) determines the level of
sensitivity of the sensor. You may need to change this value depending on the thickness of the
insulation on the mains cable. As this value increases the sensor becomes more sensitive. In
order to tune the sensor you need to change the value of Gain and try to find the point where the
sensor starts to detect the mains. Try to find the point where you’re getting Off/Present readings