


www.axxessid.com
Installation & User Guide
AX200 Installation & User Guide – July 2007
91
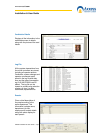
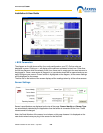
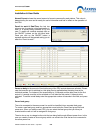
Sensor Name is specified by the user and can be changed at any time.
Port No displays the number of the port which the sensor is connected to (1•14). In the case of a
built-in sensor like Temperature/ Humidity, it shows Internal.
To enable a sensor tick the check box and click the save button on the bottom of the page. Once
the sensor is enabled it will start taking readings.
Read frequency specifies how often you want the
sensor to take a reading. This number is in seconds
and could be in the range of 1 • 255.
Reporting frequency tells you how often the reading
is displayed on the screen. The blue list on the right
hand side shows all the readings taken by the current
sensor.
Store frequency is how often the reading is stored in the i-box. This option is only applicable for
certain types of sensor.
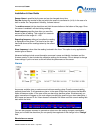
Advanced settings include more information on sensor’s name and identity, hardware and the
firmware version. It also includes the calibration settings for the sensor. Do not attempt to change
these settings if you’re not sure as this will affect the performance of the sensor.
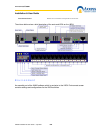
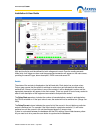
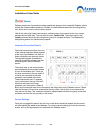
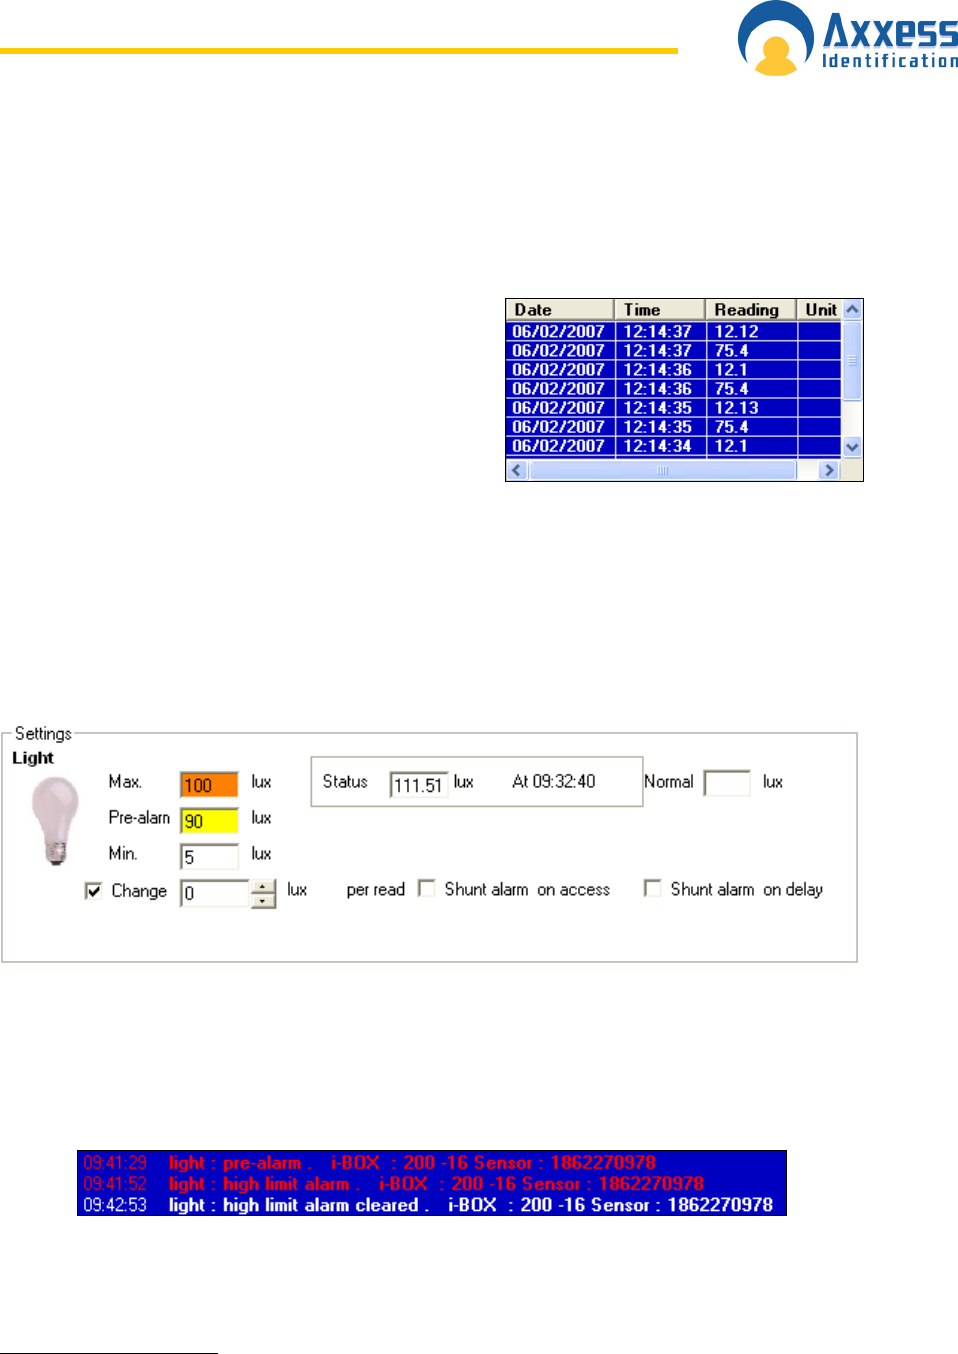
Alarms
Any sensor could be given a maximum and minimum reading value. Once the current reading
exceeds those limits, it will generate an alarm. In the case of High/Low limit alarms the Max/Min
fields will become amber. In the case of the pre-alarm they become yellow. Simultaneously, an
alarm transaction will appear on the main screen providing the sensor’s type, alarm description, i-
BOX name and sensor ID. An “Alarm cleared” transaction will follow once the current reading falls
back within the limits.
You can also program a sensor to generate an alarm once the reading changes considerably.
Once you’ve ticked the check box you can specify the magnitude of this change in the “Change”
field.
Shunt alarm on access