


www.axxessid.com
Installation & User Guide
AX200 Installation & User Guide – July 2007
43
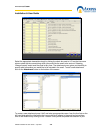
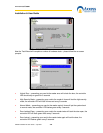
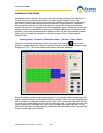
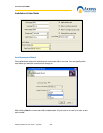
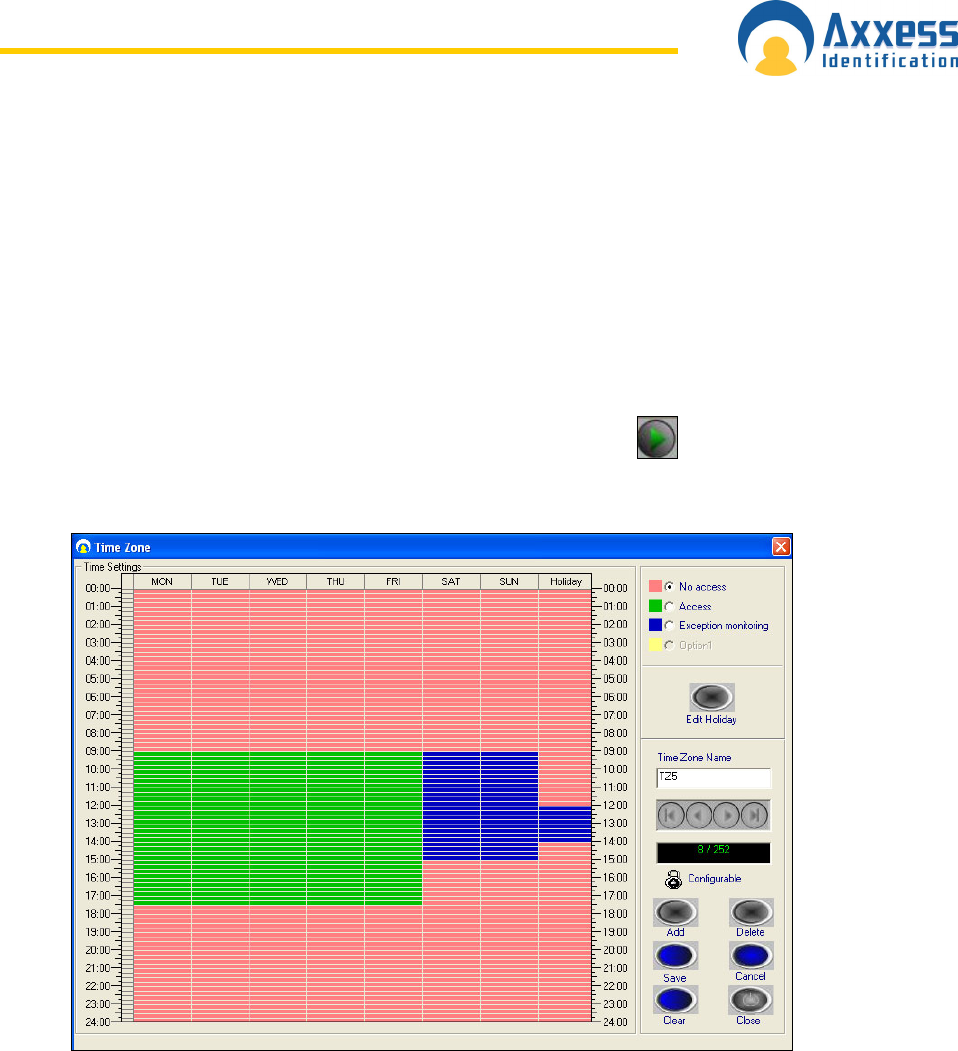
downloaded onto the controller. Every day of the week has been divided into the periods of 15
minutes. Red zone is when the card holder will not gain access through the door. If the
cardholder presents his/her card during this period the message on the screen will say that the
time zone is not active and therefore access will be denied. To grant access to a cardholder
during a specific period of time, click on the start time, hold the left click down and drag the
mouse to the end time. The selected period will be displayed in green. Alternatively you can give
exception access to the cardholder by selecting the “Exception Monitoring” and follow the same
procedure. In this case the selected area is displayed in blue. So when the cardholder presents
his/her card to the reader the transaction on the main screen will be of “Access granted –
Exception” type.
Access granted – Exception <Cardholder’s Name> <Card No.> <Door’s Name>
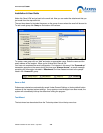
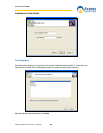
Once you’ve finished programming your time zone press Save. Use the
button to scroll
through the existing time zones. The first 9 records including No Access, Always Access, Always
Exception and TZ1 • TZ6 are the defaults and included in the blank database.
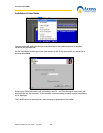
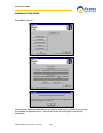
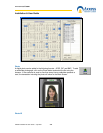
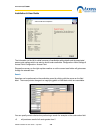
Access on holidays could be programmed separately. To change the holiday settings press “Edit
Holiday”. Mark the holidays in the calendar simply by clicking on them. Once you’ve highlighted a
date, it is added to the selected holidays list on the right. If you need to take a day off the list click
on it once more. Some holidays are not fixed and move every year. Tick the check box next to the
regular holidays (like Christmas) so you won’t have to program them again next year. You can
enter a brief description for each holiday by pressing the “Edit Description” button. Click save and
close the screen when you’re finished.