


Scanning |
225
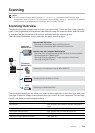
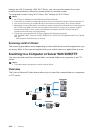
Scanning From a Computer Using Web Services on
Devices (WSD)
If the printer is connected to a computer via network using Web Services on Devices
(WSD), you can scan documents from the computer.
NOTE:
• To scan from the computer using Web Services on Devices (WSD), you need to setup connection
using Web Services on Devices (WSD).
• Web Services on Devices (WSD) is supported only on Windows Vista
®
, Windows
®
7, Windows
®
8,
Windows
®
8.1, and Windows
®
10.
Preparations for Scanning From the Computer
The same preparations are necessary as in using the Scan to Computer feature. See
"Scanning to a Computer With a Network Connection."
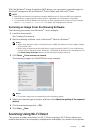
Scanning From the Computer
The following procedure uses Windows
®
7 and Windows
®
10 as example.
1 Load the document(s).
See "Loading Documents."
2 For Windows
®
7:
Click Start Devices and Printers.
For Windows
®
10:
Right-click the Start button, and then click Control Panel Hardware and Sound
Devices and Printers.
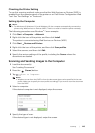
3 Right-click the printer, and then select Start scan.
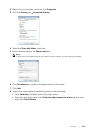
4 Specify the necessary settings for scanning, and then click Scan.
NOTE:
• When you use Windows Vista
®
, use the drawing software such as Microsoft
®
Photo Gallery,
select the printer connected using the Web Services on Devices (WSD), and start scanning.
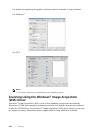
Scanning Using the TWAIN Driver
With the TWAIN driver, you can import scanned images to a software such as Adobe
®
Photoshop
®
.
NOTE:
• Both USB and Network connections are supported.
• This feature is supported on Windows
®
and Mac OS X 10.7 or later.
• To check and set the IP address of the printer, or set the password for Functions Control feature
when PC Scan is set to On (Password). For details, see "Managing the Scanner."
The following procedure uses typical program that supports TWAIN as an example.
1 Load the document(s).
See "Loading Documents."
2 Start the graphic software that supports TWAIN, such as Adobe
®
Photoshop
®
.
3 Select the scanner from the TWAIN menu on the graphic software, specify the
necessary settings, and then start scanning on the window such as shown below.