


Scanning |
239
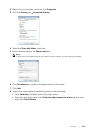
4 Tap Scan to USB.
5 Select a folder to save the scanned data.
See "Specifying a Folder to Save the Scanned Data."
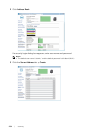
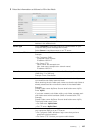
6 Tap , and then check and change the scan settings.
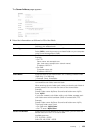
See "Scan Settings."
7 Tap Scan.
CAUTION:
• Do not remove the USB flash drive while the printer is accessing the drive.
The data in the drive may be destroyed, or the drive itself may be damaged and become
unusable.
When the document is loaded on the document glass, the screen prompts you to
scan another page.
• If you want to scan another page, place the document, and then tap Continue.
• If you are finished scanning, tap Done.
8 Remove the USB flash drive from the printer.
CAUTION:
• Make sure that the printer is not accessing the USB flash drive.
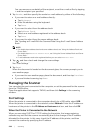
Specifying a Folder to Save the Scanned Data
To save the scanned data to a folder in the USB flash drive, specify the folder before
executing the scan job.
1 If folders exist in the USB flash drive, the folder names appear on the touch panel.
2 Select a folder to save the scanned data.
NOTE:
• The default saving location is the root directory of the USB flash drive.
• You cannot directly enter a folder path using the numeric keypad.
• You can select any folder in the USB flash drive but cannot create a new folder in this step.
You should always create a new folder before connecting the USB flash drive to the printer.
If the name of the scanned data already exists in the folder, the printer generates a
new file name to save the data.
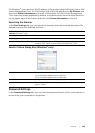
Sending a Scanned Data via E-Mail
You can send the data scanned as an e-mail attachment using the Scan to Email feature.
To send an e-mail, an e-mail account is necessary such as the corporate mail account or
the Internet service provider's mail account. Gmail account can be used as well.
The following are the procedures necessary to setup Scan to Email feature:
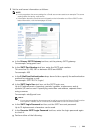
1 "Gathering the Necessary Information About Your E-mail Account"
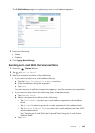
2 "Setting the DNS Server Address"
3 "Setting the Information Necessary to Access the Mail Server"