


250
|Faxing
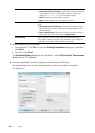
4 Tap , and then check and change the fax settings.
See "Fax Settings."
5 Tap On Hook.
6 Enter the fax number of the recipient using the number pad.
You can also select the recipient by using speed dial number or address book. See
"Automatic Dialing."
7 Tap Send.
NOTE:
• To cancel the fax job, tap Stop at any time while sending the fax.
When the document is loaded on the document glass, the screen prompts you for
another page.
• If you want to place a new document, replace the document with a new
document, and then tap Continue.
• When you have finished loading documents, tap Done.
Confirming Transmissions
When the last page of your document has been sent successfully, the printer beeps and
returns to the standby mode.
If something goes wrong while sending your fax, an error message appears on the touch
panel.
If you receive an error message, tap Close to clear the message and send the document
again.
You can set the printer to print a confirmation report after each fax transmission. See
"Fax Transmit."
Automatic Redialing
If the number you have dialed is busy or there is no answer when you send a fax, the
printer redials the number every minute based on the number set in the redial settings.
For details about how to change the time interval between redials and the number of
redial attempts, see "Fax Settings."
NOTE:
• The printer does not redial a number when you send a fax manually.
Sending a Delayed Fax
The delayed start mode can be used to save scanned data for transmission at a specified
time to take advantage of lower long distance rates.
Once delayed start mode is activated, the printer stores all of the documents to be faxed
into its memory and sends them at the specified time.
After faxing in the delayed start mode is complete, the data in the memory is cleared.
1 Load the document(s).
See "Loading Documents."
2 Press the (Home) button.
3 Tap Fax.