


Reference Information, cont’d
CrossPoint 450 Plus and MAV Plus Switchers • Reference Information
B-14
Removing and Installing Button Labels
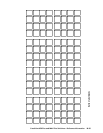
Page B-15 provides strips of blank button labels. If desired, copy them or cut them
out, write button information in each button area as desired, and put them in the
switcher’s input or output buttons’ windows. You can also create labels using the
Button Label Generator software (see chapter 5, “Matrix Software”).
Installing labels in the matrix switcher’s buttons
Install new labels in the matrix switcher’s front panel buttons as follows:
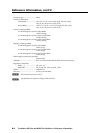
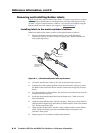
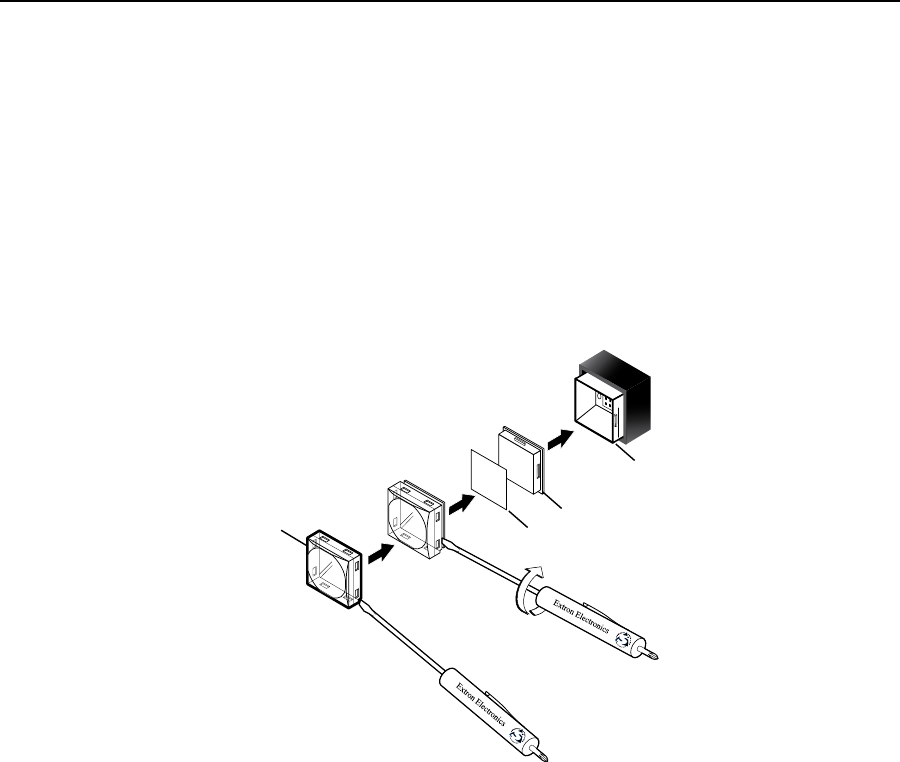
1.
Remove the button from the matrix switcher; use a small, flat bladed
screwdriver such as an Extron Tweeker to gently pry a button out from the
front panel (figure B-1).
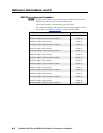
TEXT
Separate the two-
piece button here at
the corner.
Pry the two
pieces apart.
Diffuser
Base
Button Label
Clear Lens
Figure B-1 — Illuminated button label replacement
2. Locate the notch in the corner of one side of the clear button cap lens.
3. Separate the white backing (diffuser) from the clear button cap (lens); insert
the blade of the small screwdriver into the corner notch and gently twist the
blade.
4.
Save the translucent, white diffuser, but remove the text/label insert from the
transparent button cap lens.
5.
Insert the replacement button label into the button cap. Check for correct
label orientation.
6.
Align the white diffuser plate with the cap (lens). The bumps on the diffuser
plate should be aligned (top and bottom) with the notches on the clear button
cap. Firmly snap it into place.
7.
Align the tabs on the matrix switcher’s base with the notches on the diffuser
plate. Gently, but firmly, press the reassembled button into place in the
switcher’s front panel.
8.
Repeat steps 1 to 7 as needed to relabel other buttons.