


3-49
CrossPoint 450 Plus and MAV Plus Switchers • Operation
Performing a hard reset (reset mode 1)
The hard reset function restores the switcher to the base firmware that it was
shipped with. After a hard reset, events do not automatically start, but user settings
and files are restored. Perform a hard reset as follows:
N
The hard reset restores the factory-installed firmware. The switcher reverts to
that factory firmware the next time power is cycled off and on unless a firmware
update is performed before the power cycle.
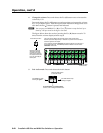
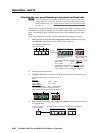
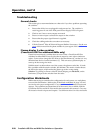
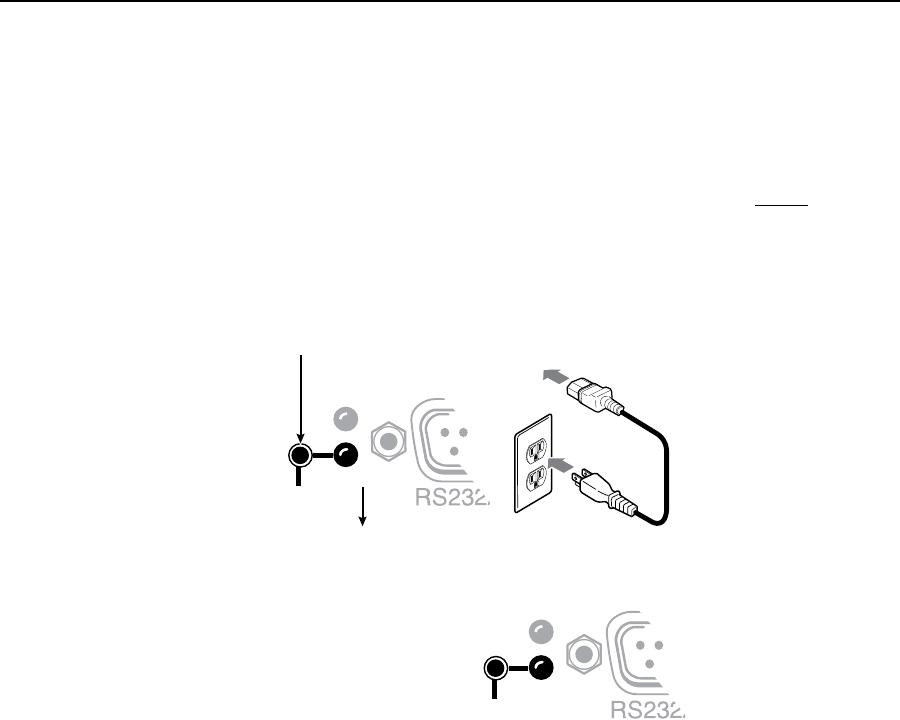
1. If necessary, turn off power to the switcher.
2. Press and hold the Reset button on the rear panel while you apply AC power
to the switcher.
Power
RESET
Rx
RESET
Rx
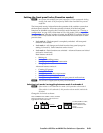
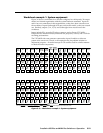
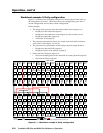
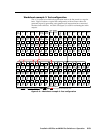
Press and hold the Reset button while you apply power to the switcher.
The switcher flashes the front panel button
indicators red, green, red, and amber and then turns them off.
Continue to hold the Reset button until all input and output buttons return
to either unlit or to background illumination and the RGBHV or Video and
Audio buttons turn on.
Release the Reset button.
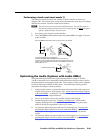
Optimizing the Audio (Systems with Audio BMEs)
Each individual input audio level can be adjusted within a range of -18 dB to
+24 dB, so that there are no noticeable volume differences between sources and for
the best headroom and signal-to-noise ratio. Each output's volume can be adjusted
from fully attenuated (muted) to full volume. Adjust the input audio gain and
attenuation and output volume as follows:
1
. Connect audio sources to all desired inputs and connect the audio outputs to
output devices such as audio players. See “Audio input and output (systems
with audio BMEs)”, in chapter 2, “Installation”. For best results, wire all of
the inputs and the outputs balanced.
2
. Power on the audio sources, the switcher, and the audio players.
3. Switch among the inputs (see “Creating a configuration”, earlier in this
chapter), listening to the audio with a critical ear or measuring the output
audio level with test equipment, such as a VU meter.
4
. As necessary, adjust the input audio level of each input (see “Viewing and
adjusting the input audio level (systems with audio BMEs)”, earlier in this
chapter) so that the approximate output level is the same for all selected
inputs.
5
. As necessary, adjust the output audio level of each input (see “Viewing and
adjusting the output volume (systems with audio BMEs)”, earlier in this
chapter).