


7. Reinstall the PCI cage. See “Replacing the PCI Card Cage” (page 72).
8. Connect any cables that are required by the PCI card.
9. Power on the server. See “Powering On the Server” (page 38).
10. Verify the installation of all PCI cards:
• Look at the LEDs of all PCI cards for proper operation. See accessory manuals.
• Run PERFVER from the Offline Diagnostics CD to ensure that all PCI cards are identified.
• Monitor the SEL to ensure there are no events showing peripheral problems.
11. Replace the top metal cover. See “Removing and Replacing the Top Metal Cover” (page 43).
12. Connect all server power, PCI, and LAN cables.
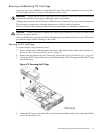
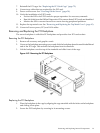
Removing and Replacing the PCI Backplane
The server backplane is called the PCI backplane and provides four PCI card sockets.
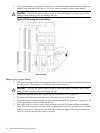
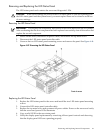
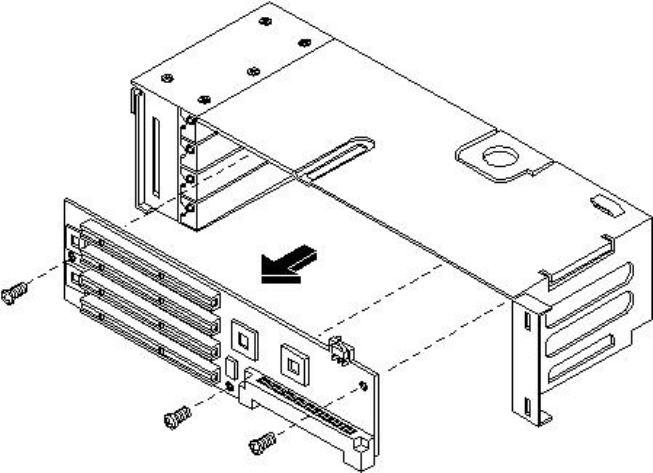
Removing the PCI Backplane
1. Remove all accessory and graphics cards.
2. Unscrew the backplane mounting screws and slide the backplane board toward the bulkhead
end of the PCI cage. This unlocks the backplane from its standoffs.
3. Lift the backplane over the top of the standoffs and slide it out of the cage.
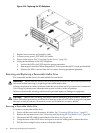
Figure 4-43 Removing the PCI Backplane
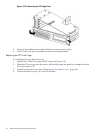
Replacing the PCI Backplane
1. Place the backplane in the cage by aligning the cage standoffs with the holes on the backplane
and sliding it into place.
2. Secure the PCI backplane by screwing in its mounting screws.
Removing and Replacing Internal Components 75