


30 Chapter 1 The basics ENWW
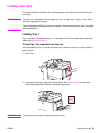
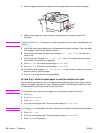
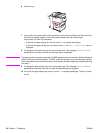
3 Adjust the paper guides so they lightly touch the paper stack, but do not bend the paper.
4 Make sure the paper fits under the tabs on the guides and not above the load level
indicators.
Note If printing on A3- or 11 x 17-size paper, or other long media, also pull out the tray extension until
it stops.
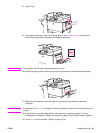
5 Look at the control panel display within a few seconds of loading the paper. (Open and close
the tray again if the time has already elapsed.)
6 If the control panel does not display the message TRAY 1 <TYPE> <SIZE>, then the tray is
ready to use.
7 If the control panel displays TRAY 1 <TYPE> <SIZE>, touch OK to change the size and type
configuration. The size menu is displayed.
8 Touch ANY SIZE. The control panel displays SETTING SAVED.
9 Touch ANY TYPE. The control panel displays SETTING SAVED.
10 If the control panel displays TRAY 1 ANY SIZE ANY TYPE, then the tray is ready for occasional
one-time use for a variety of paper.
11 Touch EXIT to accept the size and type settings.
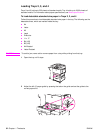
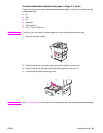
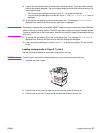
To load Tray 1 when the same paper is used for multiple print jobs
Use the following procedure if Tray 1 is loaded continually with the same type of paper, and the
paper is not usually removed from Tray 1 between print jobs. The following procedure can also
increase the MFP performance when printing from Tray 1.
CAUTION To avoid a jam, never add or remove paper from a tray while printing from that tray.
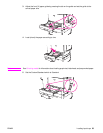
1 Touch MENU.
2 Touch PAPER HANDLING.
3 Touch TRAY 1 SIZE.
4 Touch the correct paper size. The control panel displays SETTING SAVED.
Note If you select CUSTOM as the paper size, also select the unit of measure and the X and Y dimensions.
5 Touch TRAY 1 TYPE.
6 Touch the correct paper type. The control panel displays SETTING SAVED.
7 Touch EXIT to exit the menus.