108 Working Inside the System
Add-In Boards
The PHP I/O carrier provides 10 PCI bus master slots.
CAUTION
Do not overload the PHP I/O carrier by installing add-in boards that draw
excessive current. For expansion slot current limitations, see Appendix A,
“Power System: Description/Calculating Power Usage” on page 191.
Add-in boards can be extremely sensitive to ESD and always require careful
handling. After removing the board from the protective wrapper or from the
carrier, place it component-side up on a nonconductive, static-free surface.
Do not slide the board over any surface.
✏
NOTE
Running the SSU is optional for a PCI add-in board.
Installing/Replacing an Add-In Board
You can install an add-in board when the server is operating or not operating. The following
procedure describes both scenarios.
The enhanced PCI hot-plug (EPHP) mechanism is a rotating part that actuates a switch located on
the EPHP board. Each PCI slot has four indicator LEDs: two on the outside and two on the inside
of the system. After the LED shows which slot is powered down, you can press the EPHP
mechanism on the actuator, rotate the mechanism, and remove the PCI board. After a new
PCI board is installed, rotate the EPHP mechanism back into place to activate the switch and
secure the board.
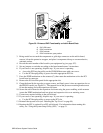
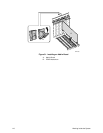
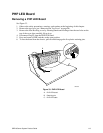
See Figure 30 (page 109) and Figure 31 (page 110).
1. Observe the safety precautions, warnings, and cautions at the beginning of this chapter.
2. Remove the PCI bus hot-plug cover (see “Removing the PCI Bus Hot-Plug Cover,” page 97).
CAUTION
Some accessory/option board outputs exceed Class 2 or limited power
source limits and must use appropriate interconnecting cabling in
accordance with the national electric code during installation.


