6: Remote System Control
Spider™ and SpiderDuo® KVM-over-IP Device User Guide 51
The other selections provide a change of appearance for a visual clue that the focus is on the
remote computer; the cursor changes back when the focus is back at the client system
(including those areas of the Remote Console window outside the main viewport.)
Selections made in the Local Cursor submenu are associated with the current user and will be
saved for the next Remote Console session.
Optimizing Video
The Spider and SpiderDuo devices can automatically make adjustments to video settings
including clock and phase, and encoding to ensure that a picture displays quickly. You can also
manually specify the settings.
Auto and Manual Video Adjustment
The Spider device automatically recognizes and adapts to many standard video resolutions and
refresh rates. When it first enters the Remote Console window, it recognizes and locks onto the
video in order to provide a picture as soon as possible.
Once the window displays, click the Auto Video Adjustment button once or twice to provide a
greater degree of optimization. The Auto Adjustment process analyzes the timing of the incoming
video horizontal and vertical sync signals then adjusts the digitizing hardware parameters. If there
is slightly nonstandard timing, these parameters may be manually fine-tuned.
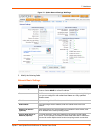
If it is necessary to adjust video hardware parameters, this may be done from Options > Video
Settings. This brings up a window with a number of slider bars.
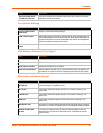
Adjust the brightness and contrast of the Remote Client window as presented by the Auto
Adjustment. This is a hardware parameter and applies to all Spider users. Overall brightness and
the contrast levels of each of the red, green, and blue primaries may be modified up or down. The
Remote Console window immediately reflects the change. Once there is a satisfactory color-
mapping, click Save Changes to retain those colors permanently for that video format. To discard
the changes made, click Undo Changes. To return a particular setting or all settings to the original
factory defaults, click Reset this Mode or Reset All Modes.
See Appendix C: Supported Resolutions and Refresh Rates for more information.
Clock and Phase
The A/D converter uses these low-level settings in the digitization process. Adjustment should not
be required unless advised by Lantronix Tech Support.
If the timing of the video signal is slightly off, the Auto Adjustment may not capture the frame at the
right point. This will result in black bars along left, right, top, or bottom of the Remote Console
viewport, and cutting off the opposite side of the captured image. The Offset sliders can be used to
align the sides properly. Once there is correct alignment, click Save Changes to retain those
settings permanently. To discard the changes made, click Undo Changes. To return a particular
setting or all settings to the original factory defaults, click Reset this Mode or Reset All.
Video Encoding
Various video encoding schemes have been defined to try to tailor the bandwidth usage to what is
available. In addition to the predefined schemes, compression levels, and color depth can be
manually adjusted. The default settings for each user are established in the KVM Console


