


Blocking junk faxes
1 Open a Web browser, and then type the printer IP address in the address field.
Notes:
• View the printer IP address on the printer home screen. The IP address appears as four sets of numbers
separated by periods, such as 123.123.123.123.
• If you are using a proxy server, then temporarily disable it to load the Web page correctly.
2 Click Settings > Fax Settings > Analog Fax Setup > Block No Name Fax.
Notes:
• This option blocks all incoming faxes that have a private caller ID or have no fax name.
• In the Banned Fax List field, enter the phone numbers or type the fax names of specific fax callers you want
to block.
Canceling an outgoing fax
Canceling a fax while the original documents are still scanning
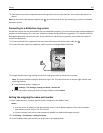
• When using the ADF, touch Cancel Job on the printer control panel while Scanning appears.
• When using the scanner glass, touch Cancel Job on the printer control panel while Scanning appears or while
Scan the Next Page and Finish the Job appear.
Canceling a fax after the original documents have been scanned to memory
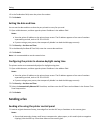
1 On the home screen, touch Cancel Jobs.
The Cancel Jobs screen appears.
2 Touch the job or jobs you want to cancel.
Only three jobs appear on the screen; touch the down arrow until the job you want appears, and then touch the
job you want to cancel.
3 Touch Delete Selected Jobs.
The Deleting Selected Jobs screen appears, the selected jobs are deleted, and then the home screen appears.
Holding and forwarding faxes
Holding faxes
This option lets you hold received faxes from printing until they are released. Held faxes can be released manually or
at a scheduled day or time.
1 Open a Web browser, and then type the printer IP address in the address field.
Faxing 113