


94
Chapter 10, Using the Matrox MAX H.264 Codec
°To assign a Matrox MAX H.264 setting:
1 In Final Cut Pro, select the clip or sequence that you want to export.
2 Choose File > Share.
3 In the Share window, select Other from the Output Type menu. This
opens the
Settings window that contains the Compressor settings.
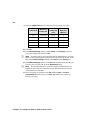
4 In the Settings window, select the desired Matrox MAX H.264 setting.
5 If you’re exporting to Blu-ray format and you want to export audio as well,
you must add a separate output for audio in the
Share window, and then
assign an audio setting to that output. Matrox provides predefined audio
settings for each of the Matrox settings, however, you can choose to use
another audio setting.
6 Export the output(s) as you would normally.
Specifying settings for exporting to QuickTime
in Final Cut Pro and QuickTime Pro
This section details how to specify Matrox MAX H.264 compression settings in
Final Cut Pro and QuickTime Pro for delivering QuickTime files for the web, and
for use with Apple TV, iPod, iPhone, and other QuickTime-based devices. The
encoded file’s extension will be .mov. The settings described in this section are
the same when exporting to QuickTime from other QuickTime-based video
applications. For details on how to export to QuickTime from another
QuickTime-based application, see your application’s documentation.
¦NoteIf using Final Cut Pro version 7 or later, you can assign a Matrox MAX
H.264 Compressor setting directly to your Final Cut Pro clip or sequence for
delivering H.264 files for Blu-ray, the web, and mobile devices (see “Assigning a
Matrox MAX H.264 Compressor setting in Final Cut Pro” on page 93).
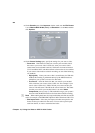
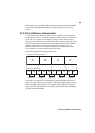
1 Open Final Cut Pro or QuickTime Pro, and open the project/video file that
you want to export.
2 Choose File > Export, and if using Final Cut Pro, click Using QuickTime
Conversion
.
3 In the Save exported file as (Final Cut Pro) or Save (QuickTime Pro)
window, click
Options.