


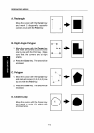
DESIGNATING AREAS
Notes for designating areas:
IJ
cl
c1
c1
c1
c1
c1
c1
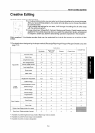
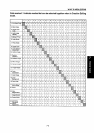
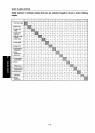
Before selecting the shape for designating the area, check which functions can be applied for each shape in
the tables (- pages
7-3 and 7-6),
Do not designate an area which overlaps part of another area.
In Creative Editing mode, the job settings specified for the area designated last will be applied for the
overlapped portion.
In Color Editing mode, the job settings might not function as specified.
The more areas you designate, the more time copying will take.
If you designate an area in Right Angle Polygon mode, make
sure to mark points that make right angles. If
you mark a point which does not match
for making a right angle, the editor will automatically specify the point
to make it a right angle.
If you mark a line and it overlaps another line you previously marked, the last point you marked will be canceled
automatically.
Because the display editor scans at 100
dpi, the inner side of curved outline might be jagged.
Under the following condition, the machine might not detect
a closed loop area completely.
● The outline is thinner than 0.5mm or 0.02 inch.
● The outline is not completely closed, it is too light to detect, or the thickness is uneven.
.
The outline is not black.
● The space between outlines is too small.
c The outline is jagged.
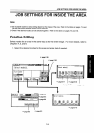
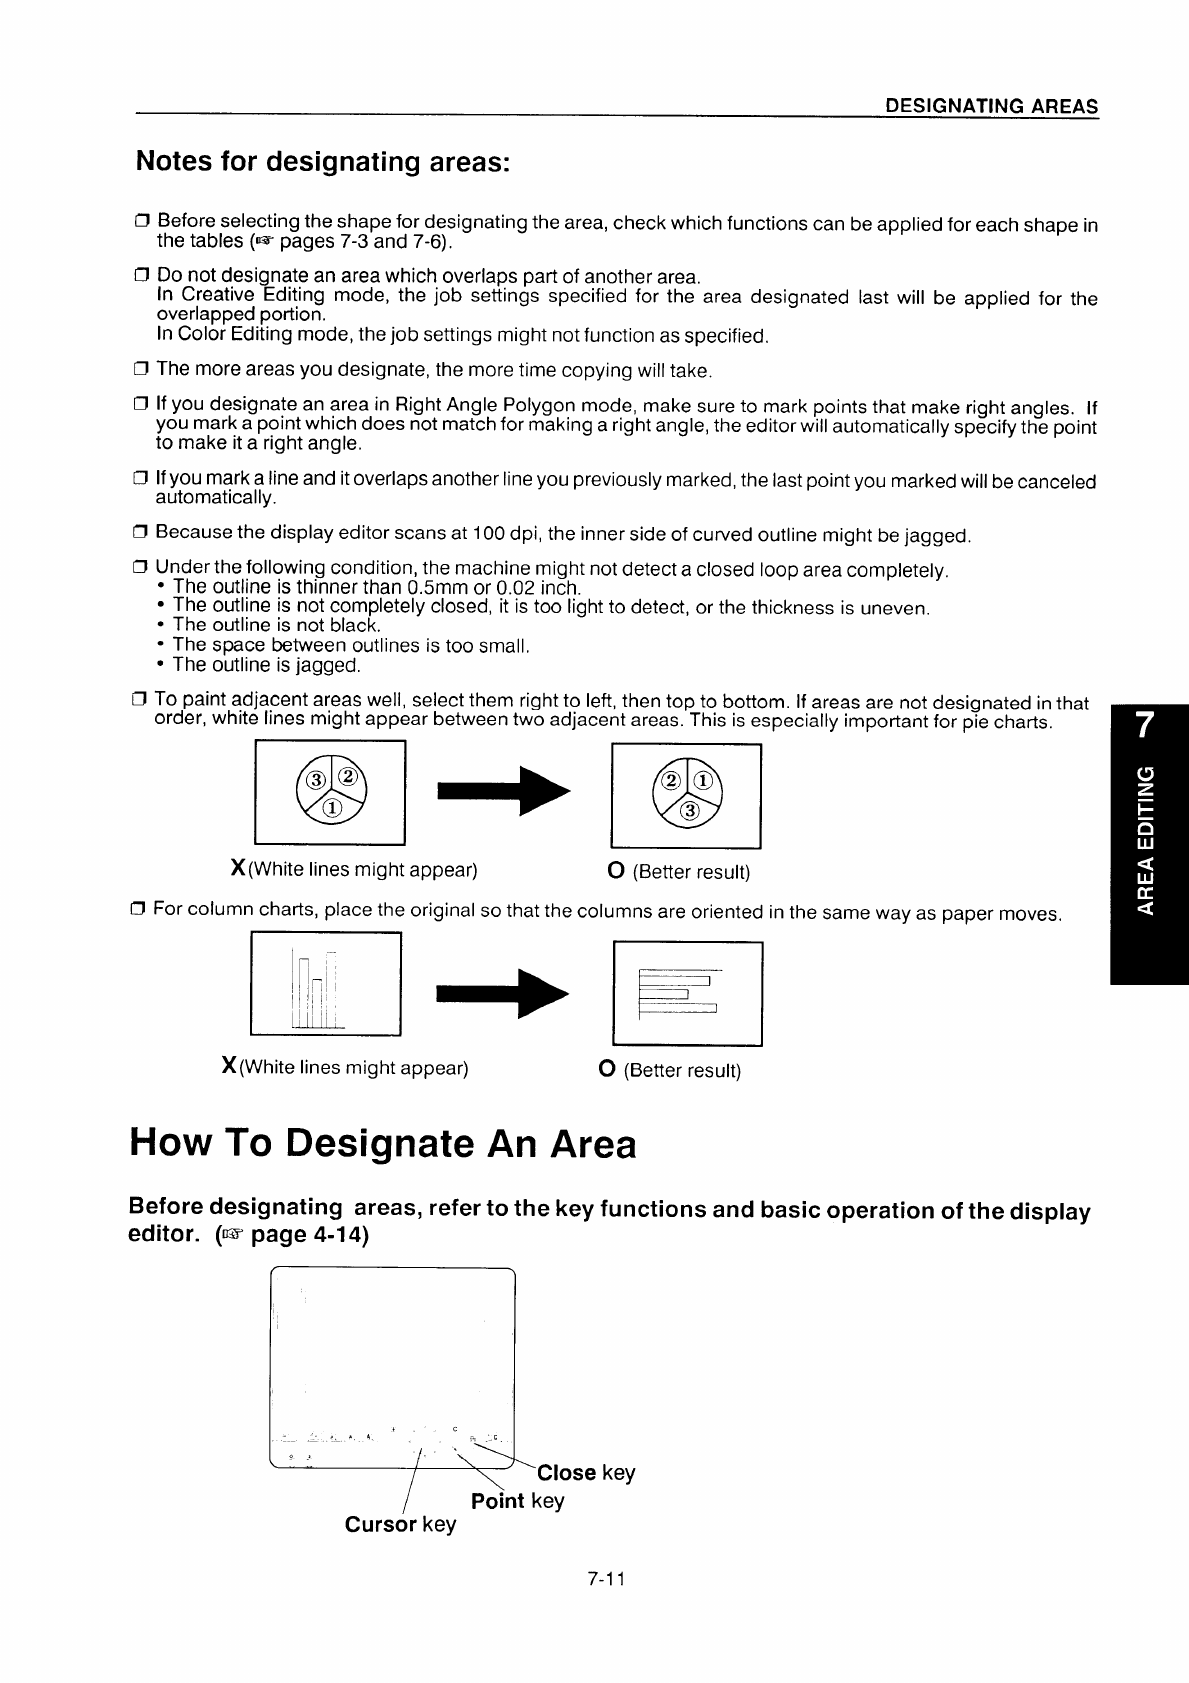
To paint adjacent areas well, select them right to left, then top to bottom. If areas are not designated in that
order, white lines might appear between two adjacent areas. This is especially important for pie charts.
pi+ pi
)((White lines might appear)
O (Better result)
~ For column charts, place the original so that the columns are oriented in the same way as paper moves.
~1+~
)((White lines might appear)
O (Better result)
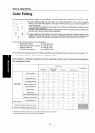
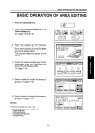
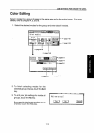
To Designate An Area
Before designating areas, refer to the key functions and basic operation of the display
editor. (I= page 4-I 4)
r
\
+ c
+._
*&
,. . . c
/
.
.?
\
‘i
>Close key
Point
key
Cursor key
7-11