NETWORK STORAGE MANAGER: ADVANCED - 119
WD SHARESPACE
USER MANUAL
USB Shares
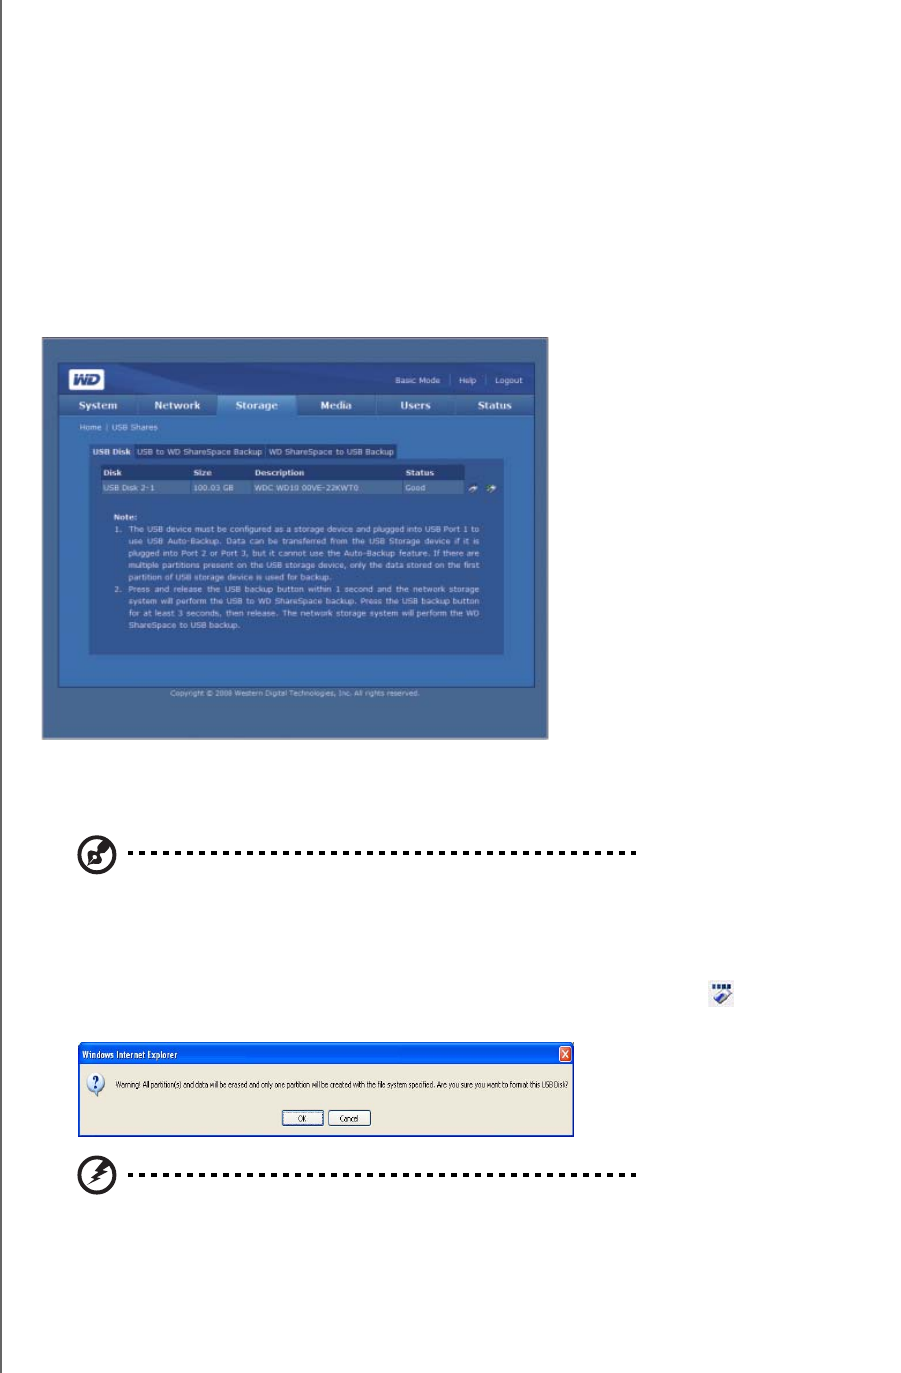
The USB Shares icon provides three tabs—USB Disk, USB to WD ShareSpace
Backup, and WD ShareSpace to USB Backup. Use these tabs to format a USB
drive, remove a USB drive, and perform backup operations from a USB drive to the
WD ShareSpace and vice-versa. When a USB storage device with the FAT, FAT32,
or NTFS file system is connected to the network storage device, the USB device will
be displayed as USB share.
USB Disk
Use the USB Disk tab to format or safely disconnect a USB drive or to configure
auto backup. (See “USB Auto Backup Feature” on page 60.)
To format a USB drive:
1. Connect a USB drive to the device.
Note: The WD ShareSpace supports USB flash disk and external USB drives; USB optical drives
(CD/DVD combo or DVD dual/multi drive) are not supported.
2. On the USB Management page, click the USB Disk tab.
3. Select the USB disk to format, and then click the Format icon . A dialog box
warns that all data will be erased.
Warning! Formatting hard drives erases all the disk contents, including
partition tables, logical volumes, and all shared folders, subfolders, and
files. Perform this procedure only when it is safe to proceed. When
formatting a USB drive, only one partition is created, and the partition is
formatted as FAT32.
