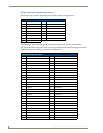
Setup Pages and Descriptions
71
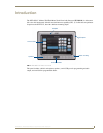
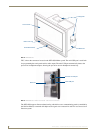
NXD-500i 5" Wall/Flush Mount Touch Panel with Intercom
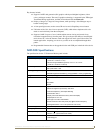
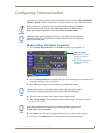
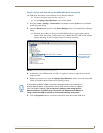
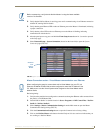
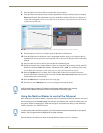
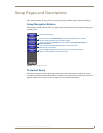
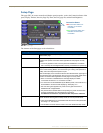
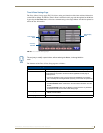
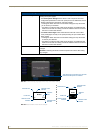
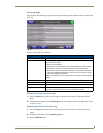
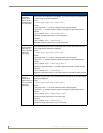
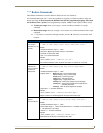
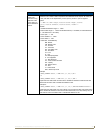
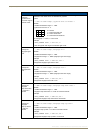
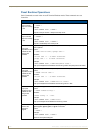
Panel Logs Page
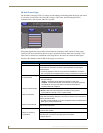
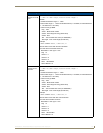
The options on the Panel Logs page allows viewing and tracking of the connection history for the panel
(FIG. 53).
Features on this page are as follows:
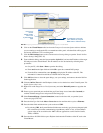
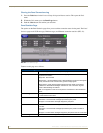
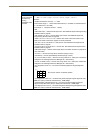
Checking the Panel Connection Logs
1.
Press the Tools button in the Protected Setup Navigation Buttons section. This opens the Tools
menu.
2. Within the Tools menu, press the Panel Logs button. All connection data is contained in the section
Connection Logs.
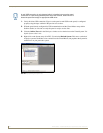
Refreshing the Panel Connections Log
1.
Press the Tools button in the Protected Setup Navigation Buttons section. This opens the Tools
menu.
2. Within the Tools menu, press the Panel Logs button.
3. Push the Refresh button.
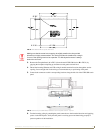
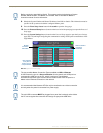
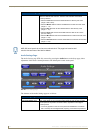
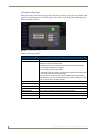
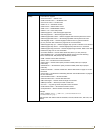
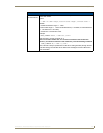
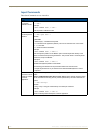
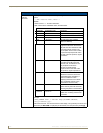
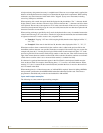
FIG. 53 Panel Logs page
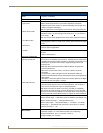
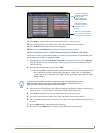
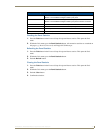
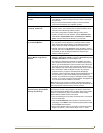
Panel Logs Page
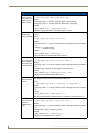
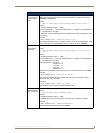
Back: Saves all changes and returns to the previous page.
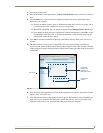
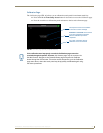
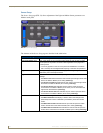
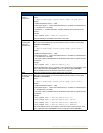
Connection Status icon: The icon in the upper-right corner of each Setup page shows online/offline state
of the panel to the master.
• Bright red - disconnected
• Bright green - connected. Blinks when a blink message is received to dark
green every 5 seconds for half a second then go back to bright green.
• Bright yellow - panel missed a blink message from the master. It will remain
yellow for 3 missed blink messages and then turn red. It will return to green
when a blink message is received.
Note: a Lock appears on the icon if the panel is connected to a secured NetLinx
Master.
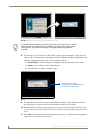
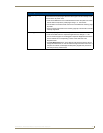
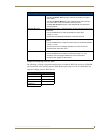
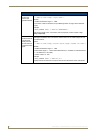
Connection Logs A history of all connections, attempts, and failures for the panel.
Clear Clears the Connection Logs history.
Refresh Refreshes the Connection Logs history.
Page Indicates the current page of the Connection Logs.
Use the Up and Down arrows to move from one page to the next.