


Copying and activating the customer’s administration and options
50 Avaya CMS R12 Sun Enterprise 3500 Computer CMS Upgrade Express
Installing the remaining disk drives
If the customer did not order any extra disk drives, continue with Activating customer
options on page 54.
For any systems where the customer ordered additional disk drives, you must install the
balance of the disk drives at this time.
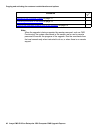
!
CAUTION:
CAUTION:
To install the remaining disk drives:
1. Unlock and open the front door.
2. Attach one end of an ESD antistatic wrist strap to the system chassis sheet metal and
attach the other end to your wrist.
3. Insert all disk drives into the required slots. For an Enterprise 3500 nonmirrored
system, install the first data disk in slot 1, the second data disk in slot 2, and the third
data disk in slot 3 (do not skip any slots).
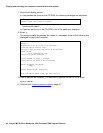
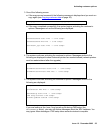
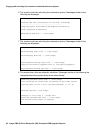
4. When all of the disks have been inserted, enter:
luxadm insert
A message similar to the following is displayed:
5. Press Enter.
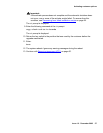
A message similar to the following is displayed:
Note:
Note: The length of the message depends on the number of disk drives you
installed. Ignore the message No new enclosure(s) were added.
Please hit <RETURN> when you have finished adding Fibre Channel
Enclosure(s)/Device(s):
Waiting for Loop Initialization to complete...
New Logical Nodes under /dev/dsk and /dev/rdsk :
cXtXd0s0
cXtXd0s1
cXtXd0s2
.
.
.
cXtXd0s6
cXtXd0s7
No new enclosure(s) were added!