


2-15
Cisco Aironet 1550 Series Outdoor Mesh Access Point Hardware Installation Guide
OL-24247-01
Chapter 2 Installing the Access Point
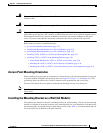
Mounting the Access Point
Warning
Only trained and qualified personnel should be allowed to install, replace, or service this equipment.
Statement 1030
Warning
Installation of the equipment must comply with local and national electrical codes.
Statement 1074
Caution To provide inline PoE, you must use the power injector (AIR- PWRINJ1500-2=) specified for the access
point. Other power injectors, PoE switches, and 802.3af power sources do not provide adequate power,
which might cause the access point to malfunction and cause over-current conditions at the power
source. You must ensure that the switch port connected to the access point has PoE turned off.
Refer to these sections for installation details:
• Access Point Mounting Orientation, page 2-15
• Installing the Mounting Bracket on a Wall (All Models), page 2-15
• Installing the Mounting Bracket on a Pole (All Models), page 2-18
• Installing 1552E, 1552EU, or 1552I in the Mounting Bracket, page 2-23
• Installing 1552C or 1552CU in the Mounting Bracket, page 2-26
–
Cable Strand Mounting the 1552C or 1552CU Access Point, page 2-26
–
Mounting the 1552C or 1552CU Access Point on a Pole/Wall, page 2-30
–
Mounting the 1552C or 1552CU Access Point Facing Up in a Vault Application, page 2-33
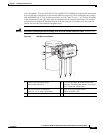
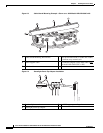
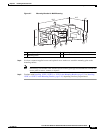
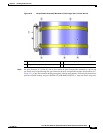
Access Point Mounting Orientation
When mounting an access point on a horizontal or vertical surface, you must ensure that the access point
is oriented with the LED indicators pointing down (see Figure 2-2, Figure 2-3, and Figure 2-4). This
positioning allows the LEDs to be visible to someone on the ground below the access point.
You must also ensure the access point is mounted with the hinged access cover facing out.
Note Omnidirectional antennas are vertically polarized and should be mounted vertically with the antennas
facing down.
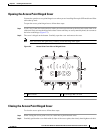
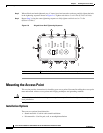
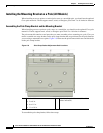
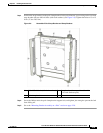
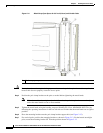
Installing the Mounting Bracket on a Wall (All Models)
The optional pole mount kit contains a mounting bracket for wall mounting. You can use the mounting
bracket as a template to mark the positions of the mounting holes for your installation. You then install
the mounting plate, and attach the access point when you are ready. Table 2-1 lists the material that you
will need to provide in addition to the pole mount kit.