


2-46
Cisco Aironet 1550 Series Outdoor Mesh Access Point Hardware Installation Guide
OL-24247-01
Chapter 2 Installing the Access Point
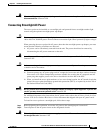
Powering the Access Point
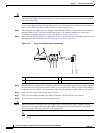
Step 3 Connect a CAT5e or better Ethernet cable from your wired LAN network to the power injector.
Warning
To reduce the risk of fire, use only No. 26 AWG or larger telecommunication line cord.
Statement 1023
Use only the 1500 power injector (AIR-PWRINJ1500-2=) for the access point. This power injector is
designed to meet the power requirements of the access point and is a listed Class 2 limited power source
(LPS).
Note The installer is responsible for ensuring that powering the access point from this type of power injector
is allowed by local and/or national safety and telecommunications equipment standards.
Tip To forward bridge traffic, add a switch between the power injector and controller. Refer to the
Cisco Wireless Mesh Access Points, Design and Deployment Guide, Release 7.0 for more
information.
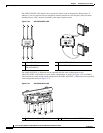
Step 4 Ensure that the antennas are connected and that a ground is attached to the access point before you apply
power to the access point.
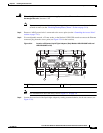
Step 5 Connect a shielded outdoor-rated Ethernet (CAT5e or better) cable between the power injector and the
PoE-in connector of the access point (see Figure 2-34).
Step 6 Connect the Ethernet cable to the access point PoE-In port (see “Connecting an Ethernet Cable to the
Access Point” section on page 2-46).
Note When a 1552E or1552EU access point is powered by PoE, the PoE-Out port is not active.
Step 7 Continue with What to Do Next, page 2-63.
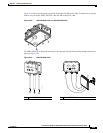
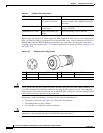
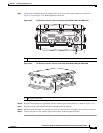
Connecting an Ethernet Cable to the Access Point
You need to supply these tools and materials:
• Shielded outdoor-rated Ethernet (CAT5e or better) cable with 0.2 to 0.35 in. (0.51 to 0.89 cm)
diameter
Note The PoE-out port is disabled when the access point is powered by the power injector.
• RJ-45 connector and installation tool
• Adjustable wrench
To connect the shielded Ethernet cable to the access point, follow these steps:
Step 1 Disconnect power to the power injector, and ensure all power sources to the access point are turned off.