


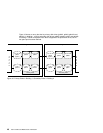
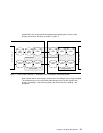
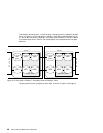
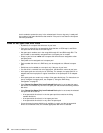


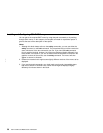
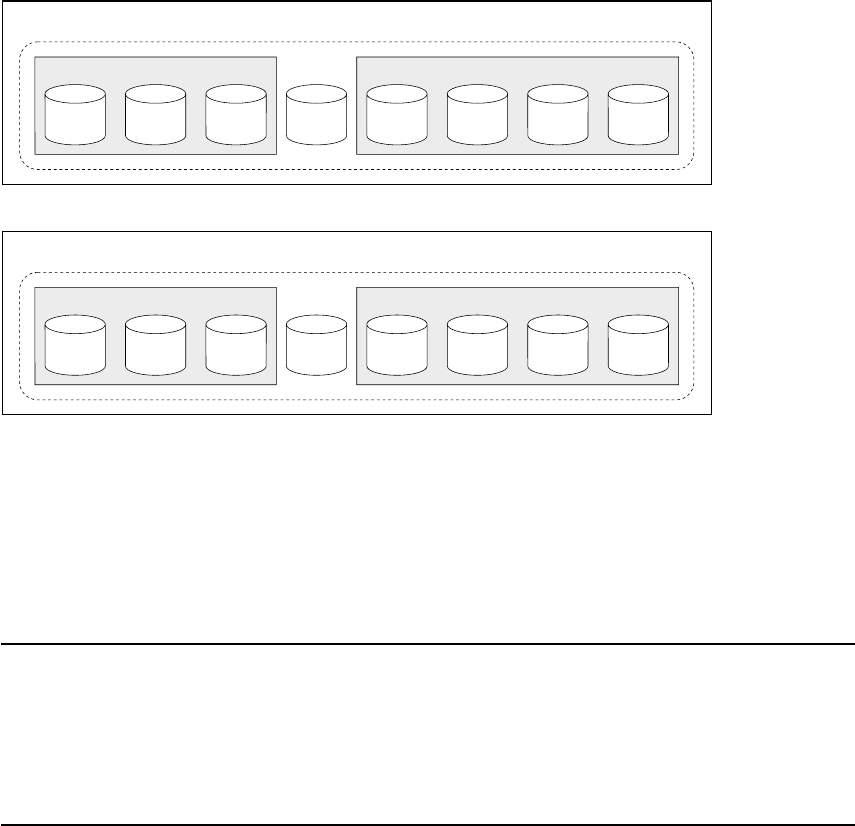
Figure 21 shows how a RAID-10 array can be protected against the complete failure of
an SSA enclosure.
The primary disk drives of the array are in enclosure 1; the secondary disk drives are in
enclosure 2. The secondary disk drives contain the same data as do the primary disk
drives. Pool A1 contains all the primary disk drives of the arrays and a hot spare disk
drive; pool A2 contains all the secondary disk drives and a hot spare disk drive. If one
enclosure fails completely, the other enclosure can still recover from a disk drive failure
because its disk drives and the hot spare disk drive are in the same pool.
Choosing How Many Hot Spare Disk Drives to Include in Each Pool
The number of hot spare disk drives that can be included in a hot spare pool is limited
only by the number of disk drives that are permitted on a single SSA loop. When
choosing how many disk drives to include in a hot spare pool, think about how many
disk drives the hot spare is protecting and how much time might elapse before a failed
disk drive can be replaced.
Choosing the Error Threshold (Alarm) Level for a Hot Spare Pool
Normally, a hot spare pool reports an error when any hot spare disk drive has been
used. For some conditions, such as a disk drive failure at an unattended site, you might
prefer to delay service activities until more than one disk drive in a hot spare pool has
failed. You can specify this requirement when you create a hot spare pool. When you
create the hot spare pool (see “Adding a New Hot Spare Pool” on page 83), set the Hot
Spare Minimum parameter to be equal to the minimum number of hot spare disk drives
Enclosure-1
Pool A1
hdisk1 Primary Disks hdisk2 Primary Disks
spare
Enclosure-2
Pool A2
hdisk1 Secondary Disks hdisk2 Secondary Disks
spare
Figure 21. Pools and Hdisks along Enclosures
Chapter 5. Hot Spare Management 51