


80 Processor Heat Sink
8
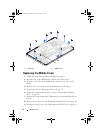
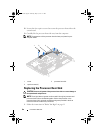
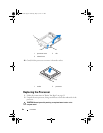
Loosen the four captive screws that secure the processor heat-sink to the
system board.
9
Carefully lift the processor heat-sink away from the computer.
NOTE: The appearance of the processor heat-sink may vary based on your
computer model.
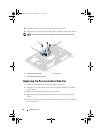
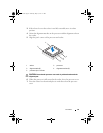
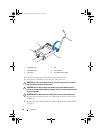
Replacing the Processor Heat-Sink
CAUTION: Incorrect alignment of the processor heat-sink can cause damage to
the system board and processor.
NOTE: The original thermal grease can be reused if the original processor and
processor heat-sink are reinstalled together. If either the processor or the
processor heat-sink is replaced, use the thermal grease provided in the kit to
ensure that thermal conductivity is achieved.
1
Follow the instructions in "Before You Begin" on page 11.
1 screw 2 processor heat-sink
3 captive screws (4)
3
21
book.book Page 80 Thursday, May 3, 2012 1:21 PM