


EPSON Stylus PHOTO 810/820/830 Revision B
Disassembly and Assembly Disassembly 99
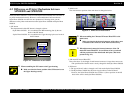
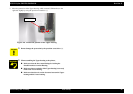
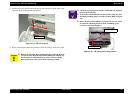
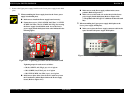
8. Pull the left end of the CR guide shaft upward, and slide the CR guide shaft to the
right side while holding the CR unit by hand.
Figure 4-14. CR unit removal
9. Remove the CR guide shaft along with the CR unit by sliding it to the left or right.
CAUTION
Remove the CR guide shaft while holding the CR unit by hand. If
you remove the CR guide shaft without holding the CR unit, the
nozzle surface of the Printhead may come in contact with the
Paper guide front, which causes the dot missing problem.
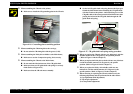
CR guide shaft
1
2
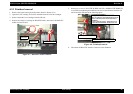
CHECK
POINT
Unlike the previous printer (Stylus COLOR 680), the oil pad is
not built in the CR unit.
If you remove the Printhead from the CR unit, make sure that
the Head grounding plate is set in the CR unit. (Refer to Figure
4-9)
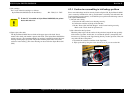
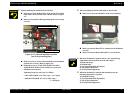
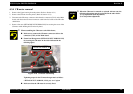
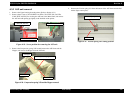
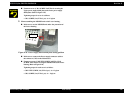
If the CR unit is disassembled or replaced with new one, make
sure that the CR timing belt is set in the assembling groove
correctly as the following figure.
Figure 4-15. CR timing belt setting position
Assembling groove
CR timing belt