


EPSON Stylus PHOTO 810/820/830 Revision B
Disassembly and Assembly Disassembly 125
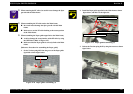
4.3.14 PF motor removal
1. Remove the Upper housing from the printer. (Refer to Section 4.3.1)
2. Remove the CR unit from printer. (Refer to Section 4.3.3)
3. Remove the ASF unit from the printer. (Refer to Section 4.3.5)
4. Remove the PSB/PSE unit from printer. (Refer to Section 4.3.6)
5. Remove the Circuit board from the printer. (Refer to Section 4.3.8)
6. Remove the PF roller unit from the printer. (Refer to Section 4.3.13)
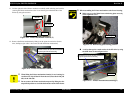
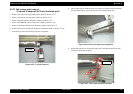
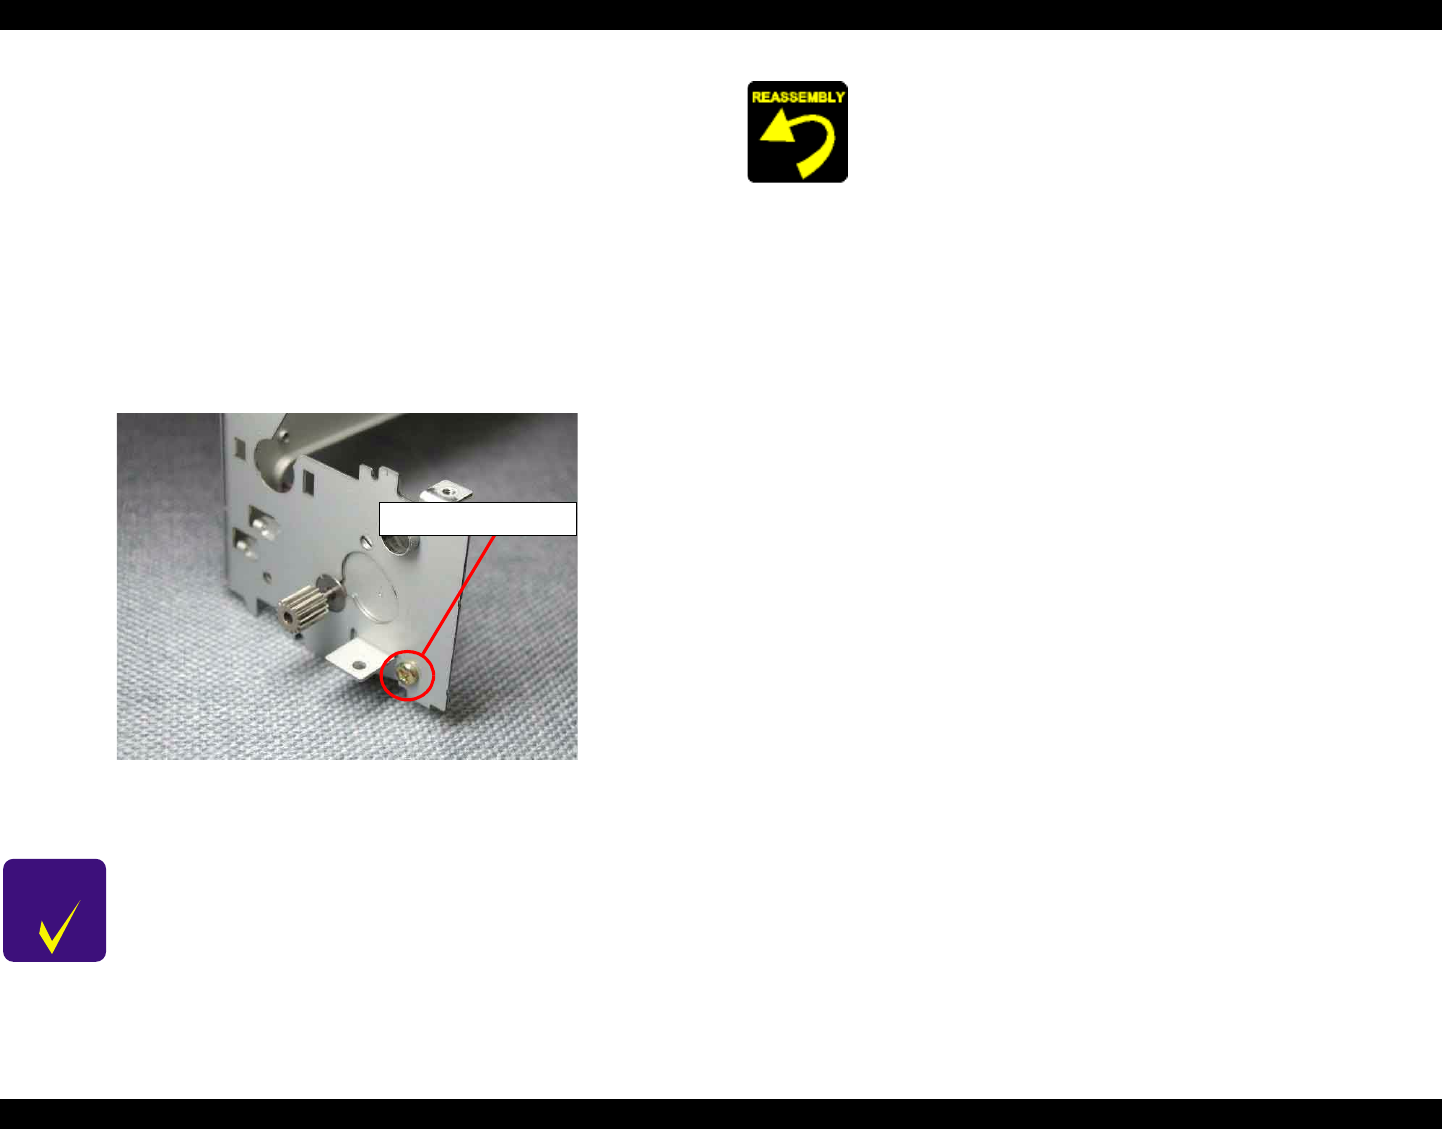
7. Remove one screw (C.B.S. SCREW 3x6 F/Zn) for securing the PF motor to the
Main frame, and remove the PF motor.
Figure 4-73. PF motor removal
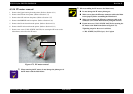
CHECK
POINT
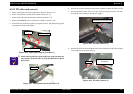
When removing the PF motor, do not damage the pinion gear of
the PF motor with the Main frame.
C.B.S. SCREW, 3x6, F/Zn
When assembling the PF motor to the Main frame,
Do not damage the PF motor pinion gear.
Make sure to place the PF motor connector cable to the Main
frame properly before assembling the Main board.
Make sure to connect the PF motor connector cable to the
connector (CN7) on the Main board by using the tweezers.
Fasten one screw (C.B.S. SCREW 3x6 F/Zn) for securing the
PF motor to the Main frame (Refer to Figure 4-73).
Tightening torque for the screw is as follows.
•
C.B.S. SCREW, 3x6, F/Zn (1 pcs) : 8 ± 1 kgf.cm