


EPSON Stylus PHOTO 810/820/830 Revision B
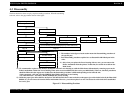
Disassembly and Assembly Disassembly 96
4.3.2 Printhead removal
1. Remove the Upper housing from the printer. (Refer to Section 4.3.1)
2. Open the Cover cartridge, and remove the both black and color ink cartridges.
3. Remove the both Cover cartridges from the CR unit.
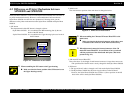
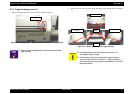
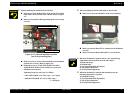
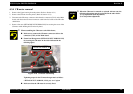
4. Release two hooks for securing the Head FFC holder, and remove the Head FFC
holder from the CR unit.
Figure 4-7. Head FFC holder removal
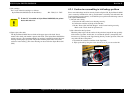
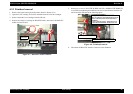
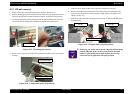
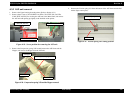
5. Remove two screws (C.B.P-TITE SCREW 3x8 F/Zn, +BIND B-TITE SEMS W2
2.5x5 F/Zb) for tightening the Printhead, and remove the Printhead from the CR
unit in the order indicated in the following figure.
Figure 4-8. Printhead removal
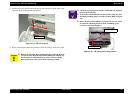
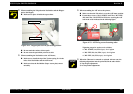
6. Disconnect the Head FFC from the connector on the Printhead.
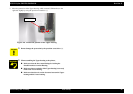
Hooks for Head FFC
Spacer FFC
Cable holder
C.B.P-TITE SCREW, 3x8, F/Zn
1
2
This figure is the Stylus Photo 810/820/830.
There is a difference of the Printhead between the
Stylus C50/C60/C61/C62 and the Stylus Photo
810/820/30.
- Stylus C50/C60/C61/C62 : Printhead for 4col.
- Stylus Photo 810/820/830 : Printhead for 6col.
+BIND B-TITE SEMS, W2 2.5x5, F/Zb